Installing an All-In-One Data Processor in VMware
You can deploy an all-in-one (AIO) Stellar Cyber data processor (DP) as a Virtual-50 on a dedicated VMware ESXi server. We support the following ESXi versions:
- 8.0
- 7.0
- 6.7
To install a cluster, contact Stellar Cyber technical support.
To deploy you must:
Preparing
Click to see the minimum system requirements for installing a DP. The installation requires:
- Dedicated ESXi server
- Public IP address for the DP (for management access)
- Disks must all be SSD
The internal network of the DP uses the 172.17.0.0/16 and 10.244.x.0/24 subnets. If you use these subnets elsewhere in your network, change them to avoid conflicts. If you cannot change them, contact Stellar Cyber technical support.
To prepare:
- Open ports on your firewall. These are required for the DP to communicate with sensors.
- Follow the link they send you.
-
If you already have credentials: https://acps.stellarcyber.ai/release/5.1.1/dataprocessor/aella-dataprocessor-5.1.1.ova.
Installation links point to the most recent release. To download a different version, simply substitute the version you want for the version specified in the link.
- Download the OVA file. Remember where you saved it.
-
Keep your one-time password (OTP, or License Key) handy for configuring the DP.
After license activation, you can find the OTP for your installation in the Licensing page.
Contact Stellar Cyber support (support@stellarcyber.ai) for login credentials and a one-time password (also known as a License Key).
Creating the VM
To create the VM:
Use our example as a guideline, as you might be using a different software version.
- Open your VMware client (we used ESXi 7.0 for this example).
-
Click Virtual Machines. A list of the existing virtual machines appears.
-
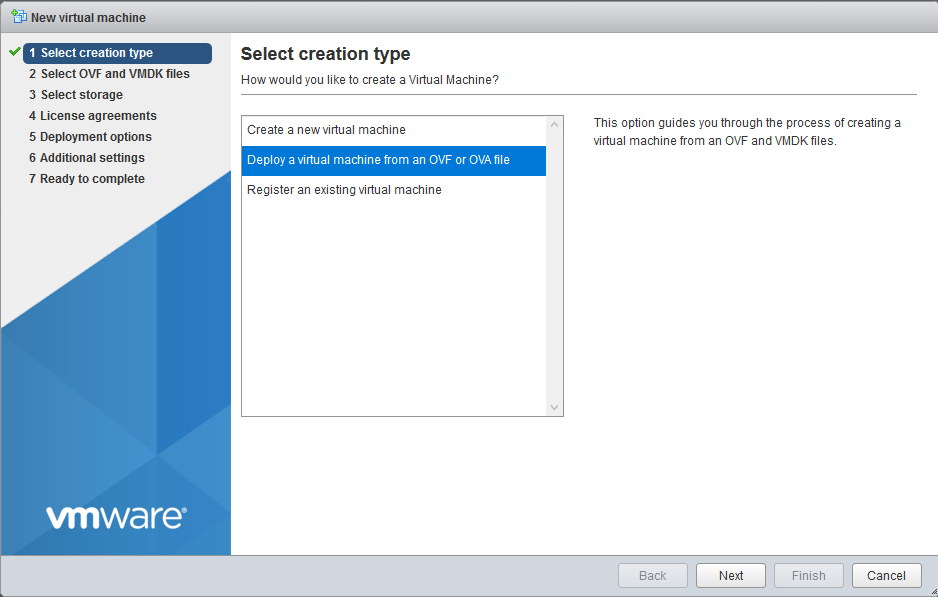
Click Create/Register VM. The New virtual machine wizard opens.

- Select Deploy a virtual machine from an OVF or OVA file.
-
Click Next. The Select OVF and VMDK files screen appears.

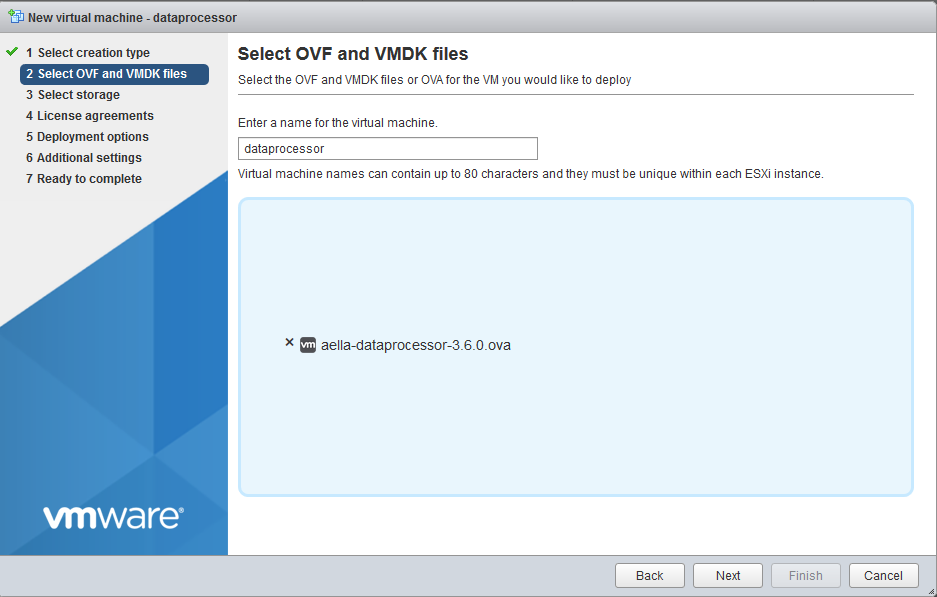
- Enter a name for your new VM. We entered dataprocessor.
- Select the OVA file you saved.
-
Click Next. The Select storage screen appears.

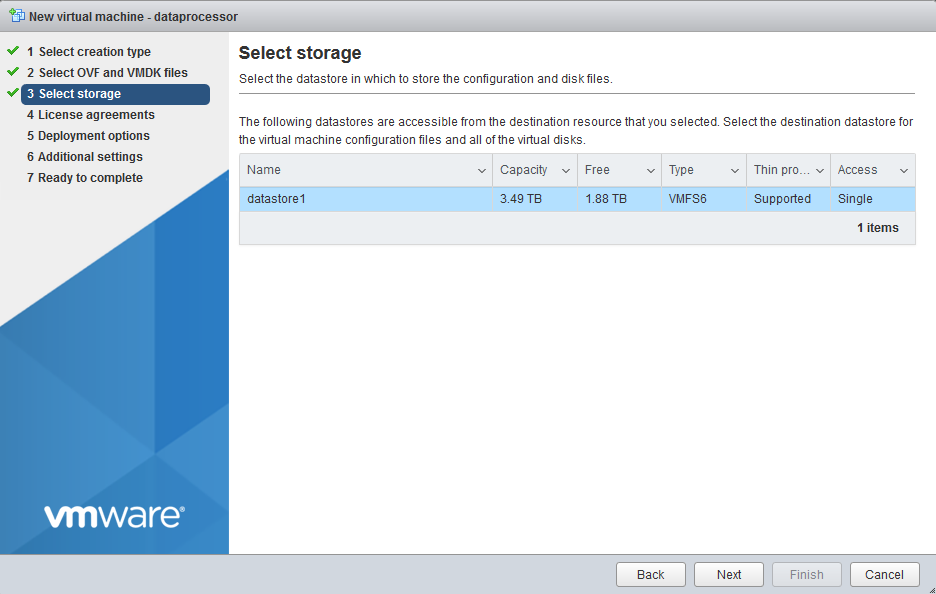
- Select your storage.
-
Click Next. The Deployment options screen appears.

- Choose your management network for the VM Network. Our management network is called VM Network in this example.
-
Select Thick for Disk provisioning.
Make sure that Power on automatically is not selected. If the VM powers on automatically, you cannot change the settings while it powers up, which can take a while.
-
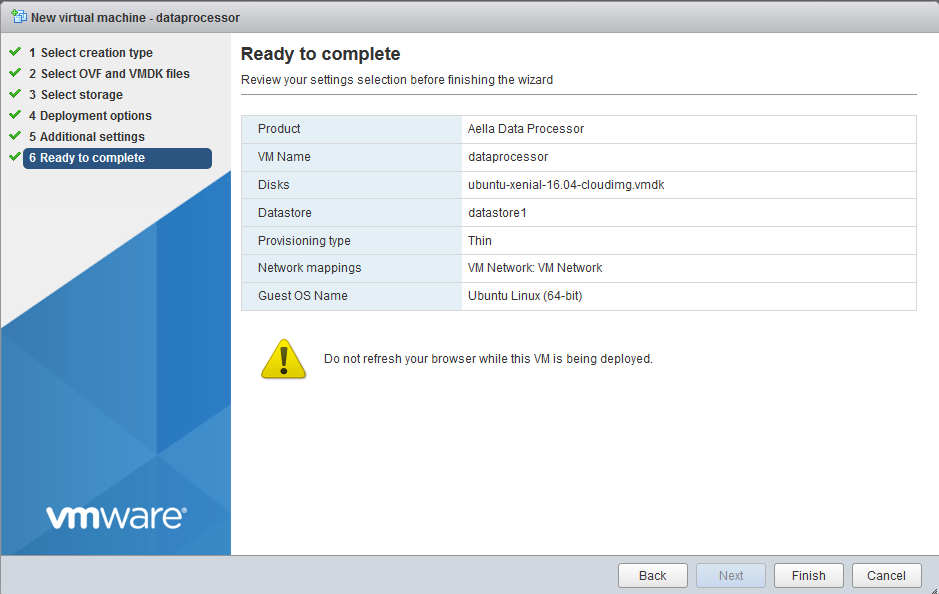
Click Next. The Ready to complete screen appears.
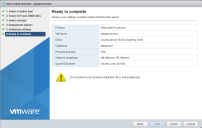
- Review your configuration.
- Click Finish. The VM is created and appears in the list of recent tasks at the bottom of the screen. It should show 0% completion.
-
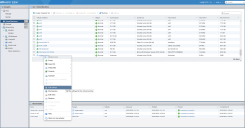
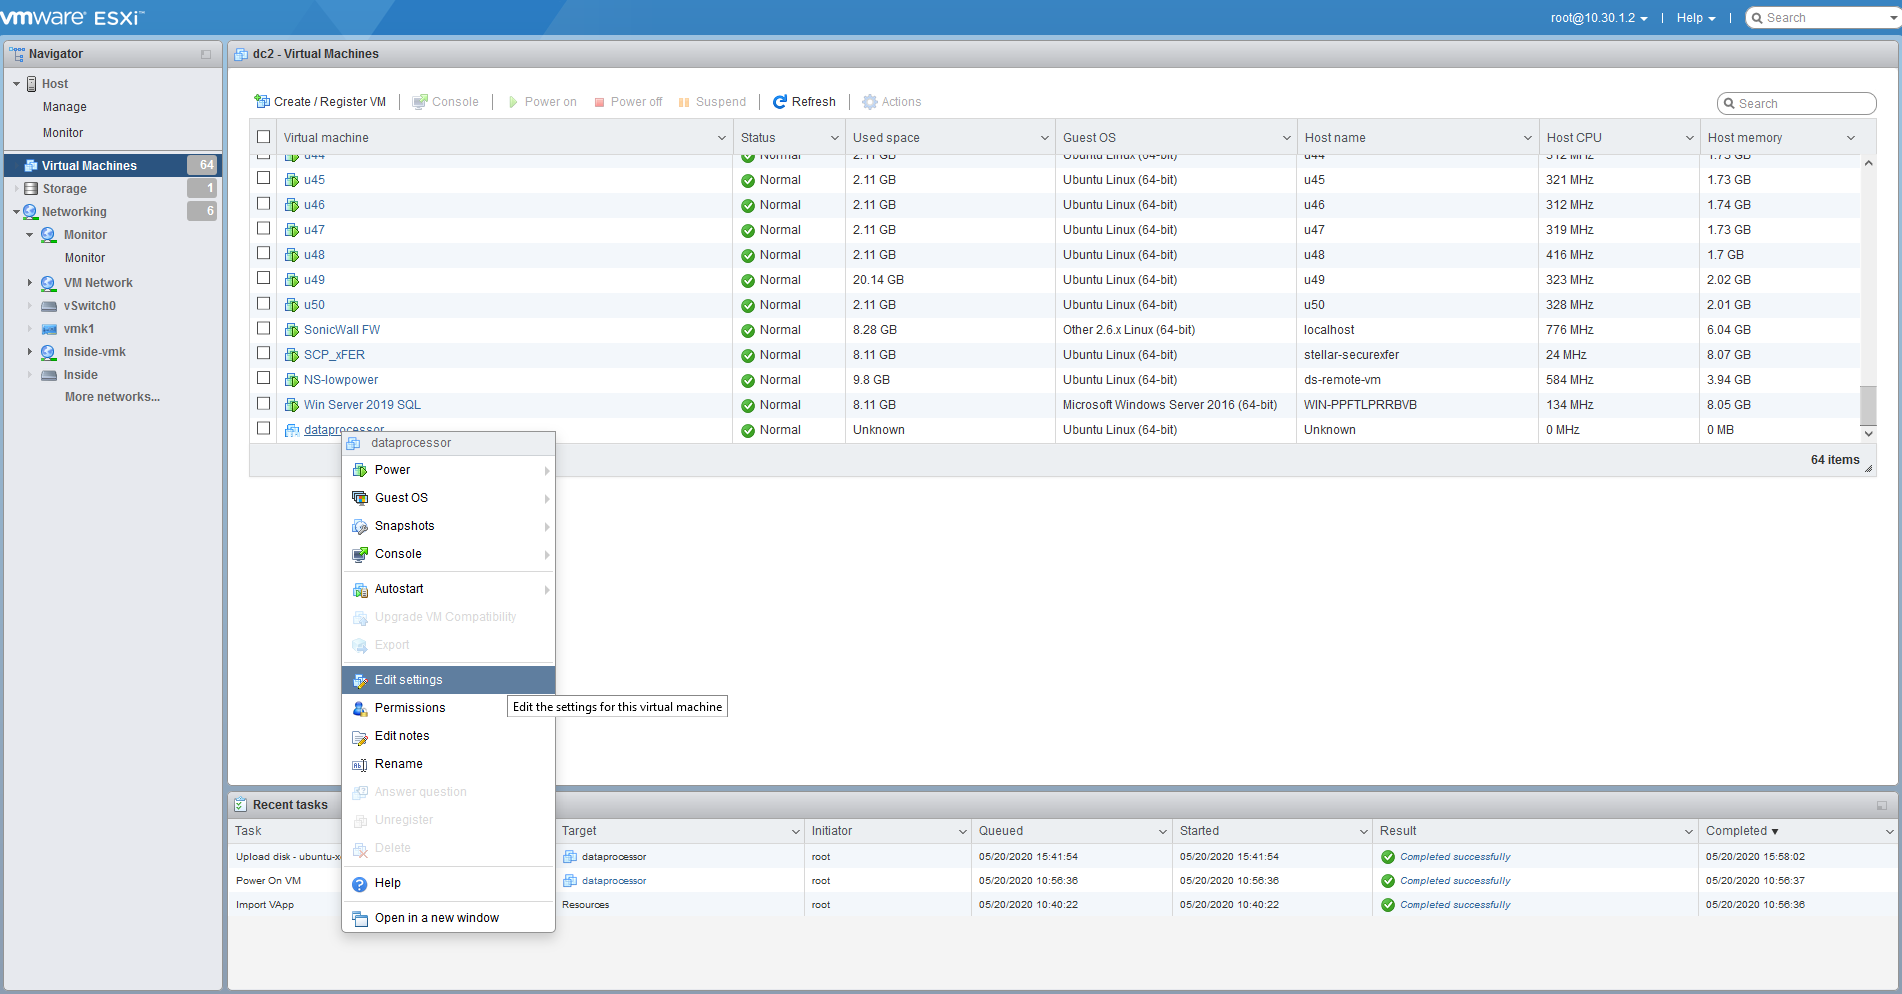
Right-click on your new VM in the Virtual Machines window.
-
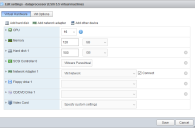
Click Edit settings. The Edit settings screen appears.
-
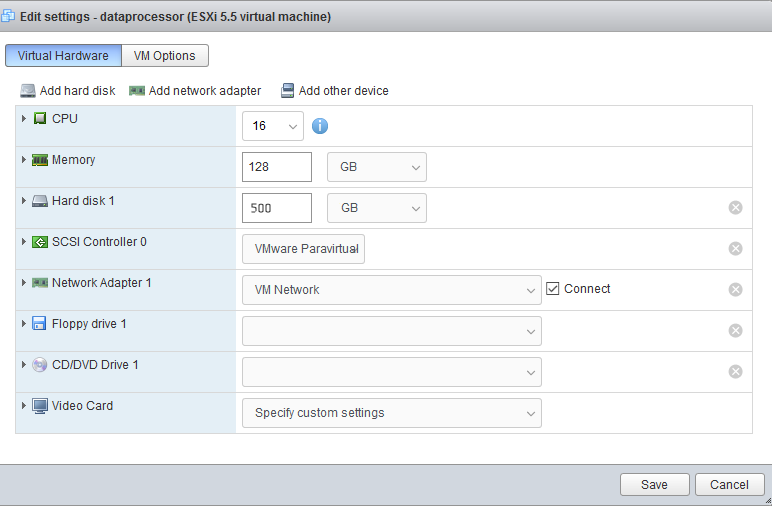
Make sure that:
- CPU is at least 16
- Memory is at least 128
-
Click the Virtual Hardware tab and click Add hard disk.
-
Choose the New standard hard disk option. A new Hard Disk entry appears in the Edit Settings dialog box.
-
Cascade open the Hard Disk entry in the Edit Settings dialog box and use the Location option to change the datastore to a location with sufficient free storage to host a 2 TB disk.
-
Set the size of the hard disk to 2 TB. Note that you must specify a size that is less than the total amount of free space in the datastore.
- Click Save.
- Right-click on your new VM in the Virtual Machines window.
- Click Power | Power on. Your VM immediately powers on.


Configuring the DP as an AIO
When the VM is up and running you can configure the DP as an AIO:
- Access the console of the VM.
- Log in. The default user/password is aella/changeme. You are immediately prompted to change the password.
- Change the password.
-
On the DP, enter these commands:
Note that in an AIO deployment, you specify the same IP address for the
set interface management ipandset cmcommands shown below.set interface management ip [IP address/netmask for your DP; for example, 192.168.14.100/255.255.255.0] set interface management gateway [IP address of your gateway] set interface management dns [IP address of your DNS, or 8.8.8.8]
set role AIO set cluster_name AIO set cluster_size 1 set cm [IP address of DP Data Lake] set otp [OTP/License Key you received from Stellar Cyber] reset - Confirm the reset. The image is downloaded (which can take a while, depending on your network) and installed.
-
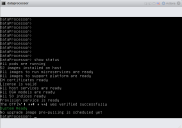
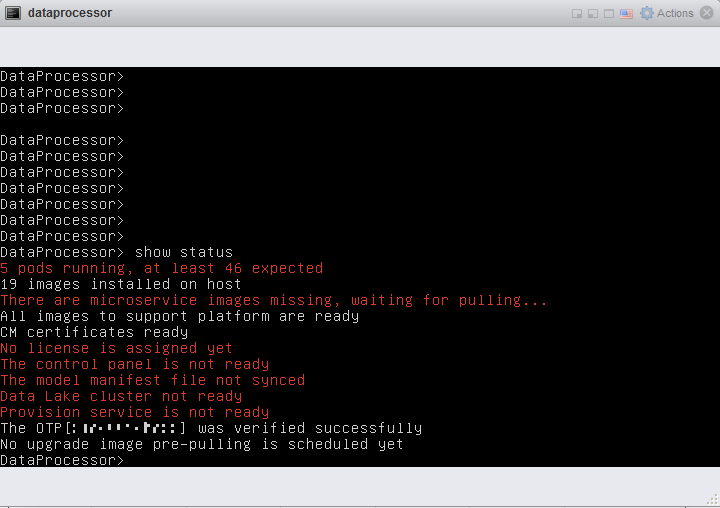
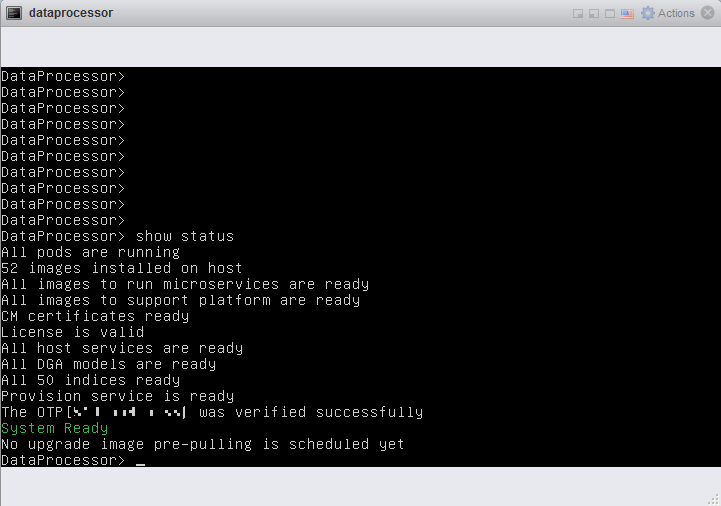
Verify that everything is installed, ready, and running with the
show statuscommand. A screen similar to the following appears as it is installing:
When it finishes the status is similar to the screen shown below. Make sure of the following in the
show statusoutput:-
80-90 images are installed on the host
-
All pods are running
-
All status messages have changed from red to white
-
Connecting to the DP GUI
Connect to the DP GUI with the URL based on the IP address of the DP. For example:
https://192.168.1.101The default user name is admin with a default password of changeme. Use the User Management page to set the password to an appropriate value.
Add Storage Drive
Next, we need to add the storage drive we created with the VM to the DP. Use the following procedure:
- Open a console connection to the DP VM.
-
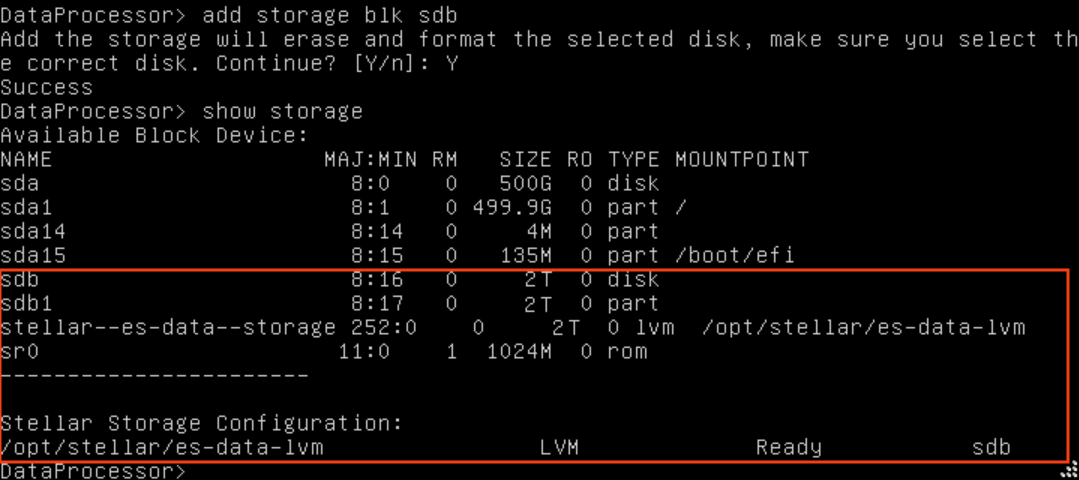
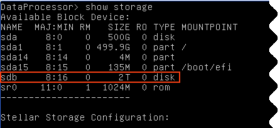
Verify that the new storage is available with the show storage command. The example below shows 2 TB available on sdb.
-
Use the add storage blk <bulk storage name> command to add the new disk for use by Elasticsearch. For example, using the sdb disk in our current example:

-
Type Y at the warning to format the selected disk.
-
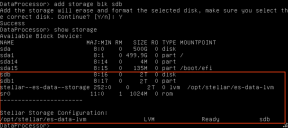
Use the show storage command to verify the disk is now available for use by Stellar Cyber. For example:
-
Log in to the DP's graphical user interface with a web browser. For example:
https://<DP Management IP Address>
-
Navigate to the System | Data Processor | Data Management | Advanced tab.
-
Click the Migrate to New Directory dropdown, select /es-data-lvm, and click the Start Migration button. This migrates saved Elasticsearch data from /esdata to /es-data-lvm.
-
Once the data migration is complete, navigate to the System | Data Processor | Data Lake page and click the 1 items button in the Node List column.
-
Check the Data Storage Space column to verify that the expected capacity is available. For example: