Configuring the DL-m and DA-m in Stellar Cyber
Once you have configured the DL-m and DA-m in their respective CLIs, you are ready to configure them in the Stellar Cyber user interface. Use the following steps:
Configure the DL-m in the Stellar Cyberl User Interface
Use the following procedure to configure the DL-m in the Stellar Cyber user interface:
-
Open a web browser and connect to the Stellar Cyber user interface using the public IP address of the DL-m you copied in Get IP Addresses for VMs
https://<ip_address_of-DL-m>
-
Log in using the default credentials of admin/changeme.
-
Enter the email address for the admin account when prompted.
-
Change your password when prompted.
-
Navigate to the System | Data Processor | Resources page and verify that the DL-m VM is listed with a Role of DL-master and the Cluster Name you specified in the CLI. For example:

-
Migrate the data directory from the system disk to the storage volume you attached in the CLI as follows:
-
Navigate to the System | Data Processor | Data Management page.
-
Click on the Advanced tab.
-
In the Data Migration section, leave Current Database Directory set to /esdata.
-
Set the Migrate to New Directory option to the secondary storage you attached in the CLI (/es-data-lvm).
-
Click Start Migration.
The data is migrated to the secondary storage disk.
-

Configure the DA-m in the Stellar Cyber User Interface
Use the following procedure to convert the DA-m VM's role from resource to DA-Master in the Stellar Cyber user interface:
-
Once the show status command for the DL-m reports System Ready and the show role command for the DA-m reports Resource, log in to the DL-m's graphical user interface with a web browser. For example:
https://<DL-m Management IP Address>
If this is your first login, the default credentials are a username of admin with a password of changeme. The DP will guide you through supplying the admin's email address and changing account credentials.
-
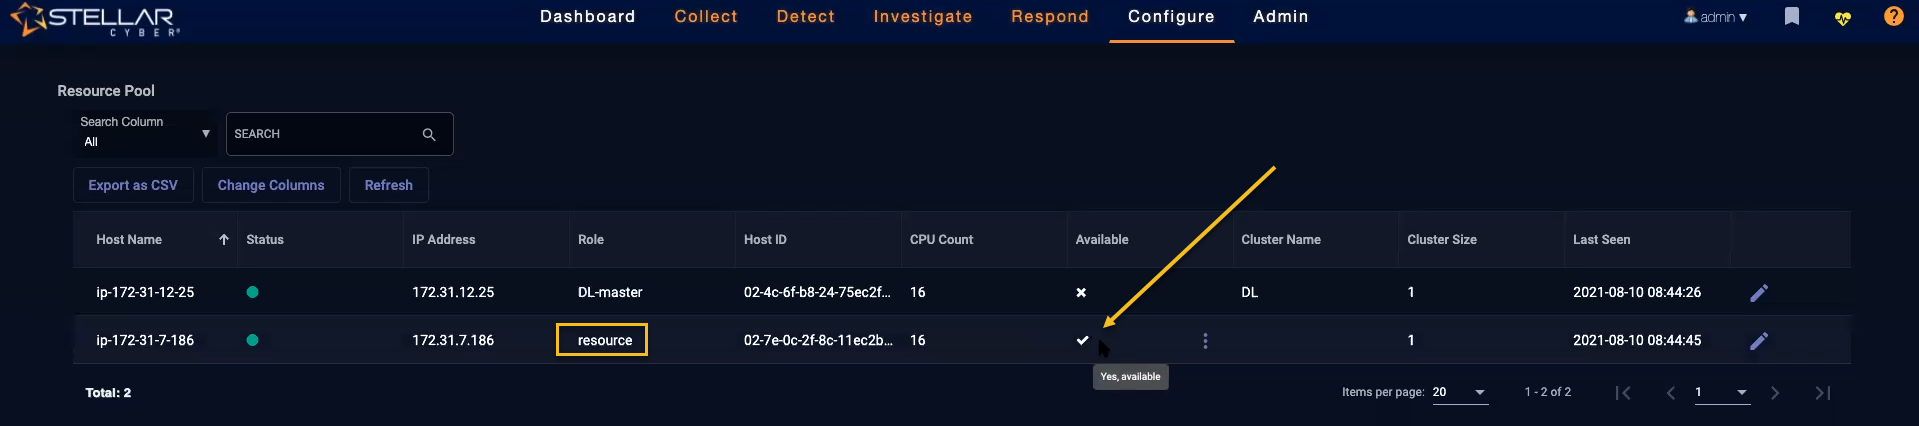
Navigate to the System | Data Processor | Resources page and make sure you see an entry with a Role of resource and a checkbox in the Available column:

Do not edit the resource directly in the System | Data Processor | Resource page. Instead, use the System | Data Processor | Data Analyzer page to convert the resource's role, as described below.
-
Navigate to the System | Data Processor | Data Analyzer page and click the Create button to create a new DA cluster.
-
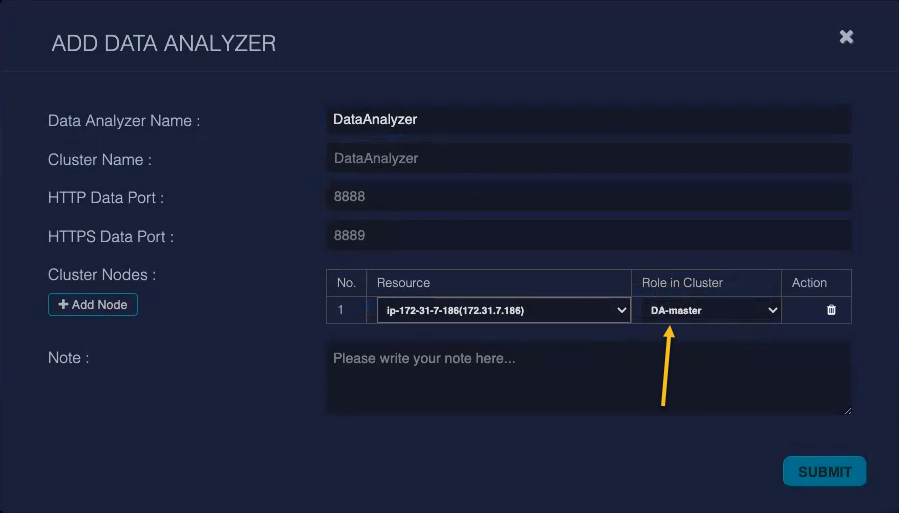
Supply the following information in the Add Data Analyzer dialog box:
-
Data Analyzer Name – DA-Master
-
Cluster Name – DA-Master (note that there are separate DA and DL cluster names)
-
HTTP Data Port/DTTPS Data Port – Leave at default values.
-
Cluster Nodes – Click the Add Node button and use the Resource dropdown to select the da-master. Then, set the Role in Cluster dropdown to DA-Master and click Submit, as in the figure below.

-
-
The system asks you if you want to set the default receiver IP address to the DA-m's private IP address. In most cases, unless you use many internal sensors, you will want to click Cancel – you do not want sensors to send data to the DA-m's private IP address, which they typically will not be able to access.
The symptoms of an incorrect default receiver IP address are sensors showing many received packets but no outbound packets.
-
Wait a few minutes, refresh the Data Analyzer Configuration page, and make sure the Node List column has updated from 0 Nodes to 1 Nodes with a green icon in the Status column.
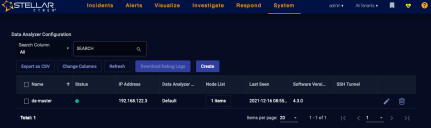

At this point, the DL-m and DA-m are deployed successfully. If you need to add more ingestion, capacity, or retention, refer to Scaling Up with Worker Nodes.
