Using the Response Tab in the Case Details View
The Case Details Response tab is where you take action on a case based on your triage and analysis in the Detection and Analysis tabs. Stellar Cyber automatically recommends actions to you based on the case's specifics and the connectors providing data for the observables in the case. For example, if a firewall provided the data for a host in your case, the Response tab typically includes a Block IP action for that host.
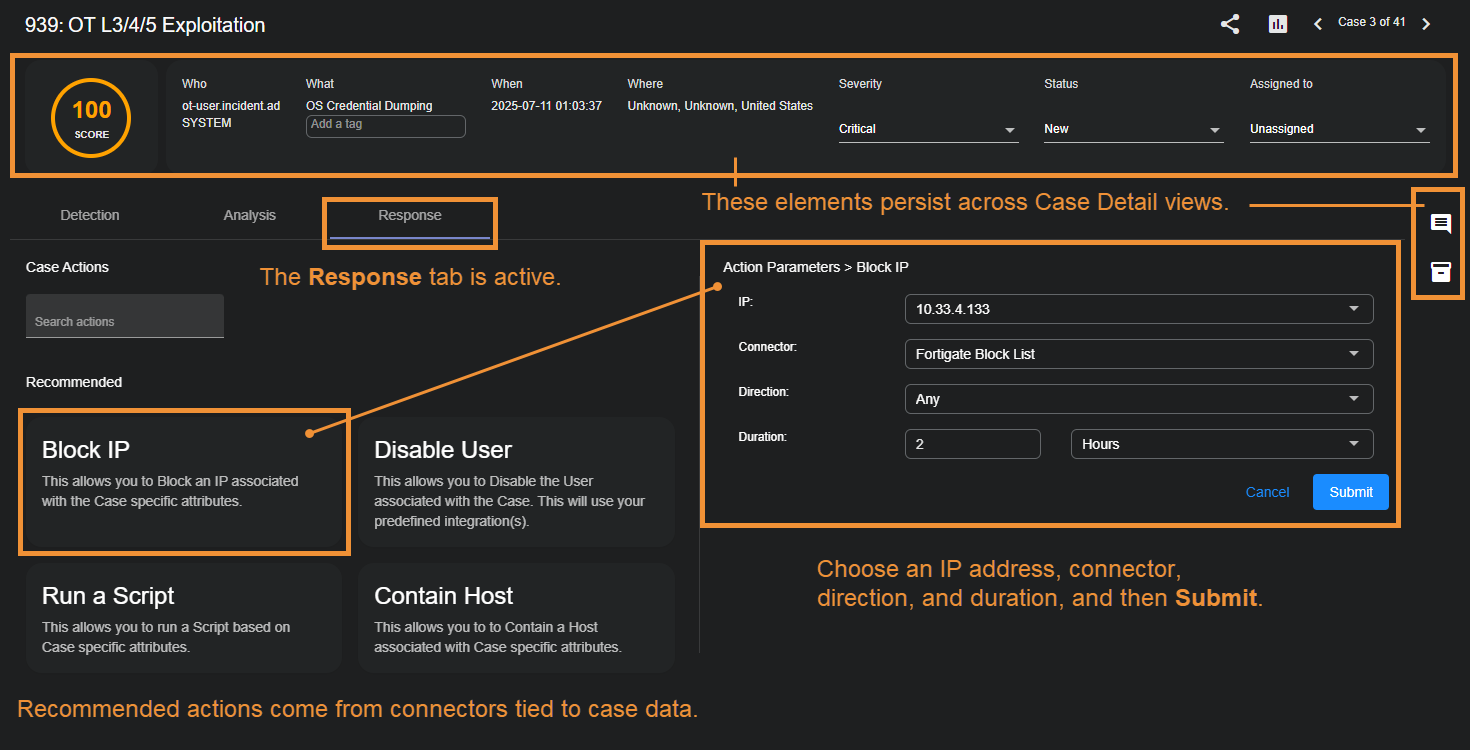
The figure below summarizes the main features of the Response tab:
Keep in mind the following when using the Response tab:
-
The actions available in the Response tab depend on the connectors providing data for the observables in the case. As described below, different connectors provide different response actions depending on their configuration and the data seen.
Because of this, the recommended actions provided by Stellar Cyber can and will vary from case to case.
-
If multiple Case Actions are listed, you can use the Search actions field to locate the one you're looking for.
-
If multiple connectors contributed data to a case, Stellar Cyber intelligently selects the connector that is most relevant to the target of your Case Action.
-
Stellar Cyber prepopulates the configuration wizards for case actions with the data corresponding to the case. For example, when configuring a Block IP action, the IP drop-down list automatically lists just those IP addresses associated with the case. You can always type in your own address, but the most relevant ones are already listed for you.
-
Once you've submitted an action, you can keep track of feedback for the action in the Automation | Action History pages.
-
The standard Identification, Evidence Locker, and Case Activity panels all remain persistent in the Response tab.
Available Case Actions
This section lists the possible Case Actions together with the information necessary to configure them. In general, the available Case Actions are the same as the External Actions found in Event Details displays.
Refer to Case Actions by Connector for details on which connectors are required for different Case Actions.
Block IP
You can immediately respond to a case by creating a new firewall rule:
-
From the Case Response tab, select Block IP.
-
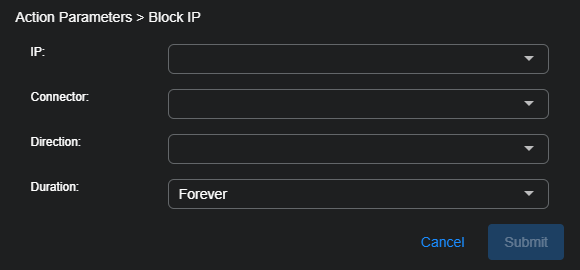
The Action Parameters | Block IP section appears.
To add a new firewall or switch, see Configuring Connectors.
-
Choose the IP address to be blocked.
The drop-down list contains all addresses associated with the case.
-
Choose the connector you want to use to perform the action.
Stellar Cyber automatically attempts to select the best connector for the IP address.
-
Set the Direction:
-
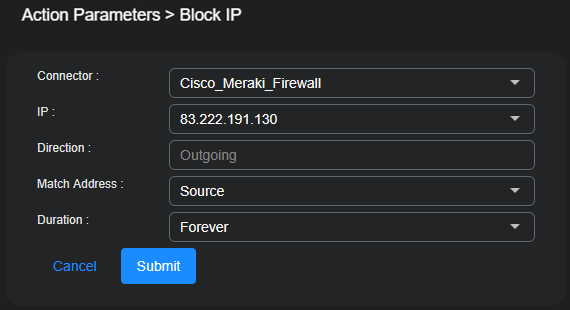
If you select a Meraki firewall, Direction is automatically set to Outgoing. Specify whether you want to Match the IP address when it appears as a Source or Destination address in the outgoing packets.
-
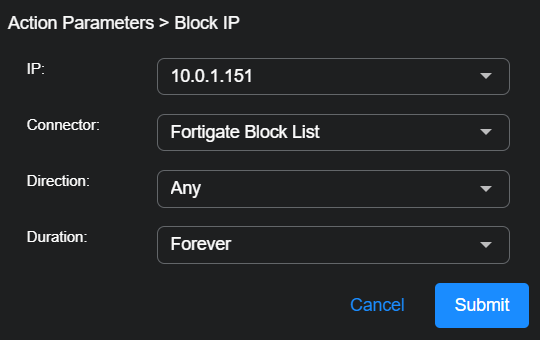
For all other firewalls, select Incoming, Outgoing, or Any.
-
When Incoming is selected, an Inbound firewall rule is created to match the Source IP address.
-
When Outgoing is selected, an Outbound firewall rule is created to match the Destination IP address.
-
-
If you select a Security Switch, the Direction setting is not applicable.
These actions are reported in Automation | Action History | Security Switch actions.
-
-
Choose a Duration.
You can choose Minutes, Hours, Days, or even Forever.
-
Select Submit.
The new firewall rule is submitted to the firewall.
-
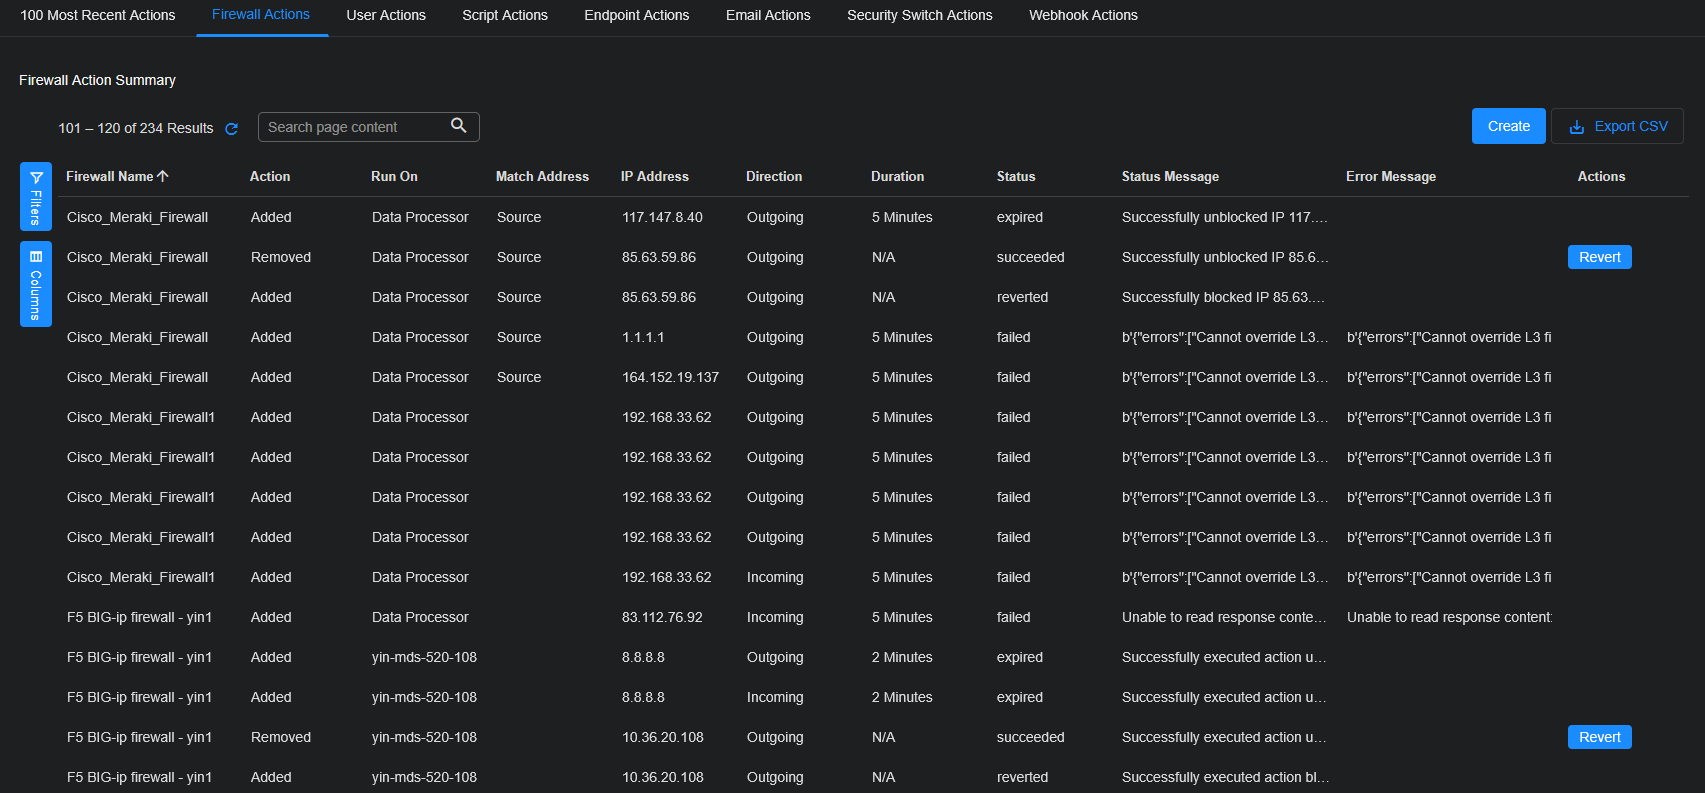
The status is reported in the Firewall Actions tab on the Action History page (Automation | Action History | Firewall Actions).
For Firewall actions, if you block an IP host that is already blocked or if you unblock an IP host that is already unblocked, the action is marked as Succeeded. You can view status details in the Status Message.
When you view Meraki Firewall actions, the fields differ from other firewalls as follows:
-
The block is reported as Incoming or Outgoing according to whether you selected Match Address as Source or Destination. However, the block is actually on outgoing traffic.
-
The Firewall Actions tab (Automation | Action History | Firewall Actions) instead shows the Direction as Outgoing for Meraki Firewalls and blank for all others. Here, you use the Match Address column to identify whether the address was a Source or Destination field for Meraki Firewalls, and use the Direction column to identify it for all other Firewalls.
-
Disable User
You can immediately respond to a case by disabling a user:
-
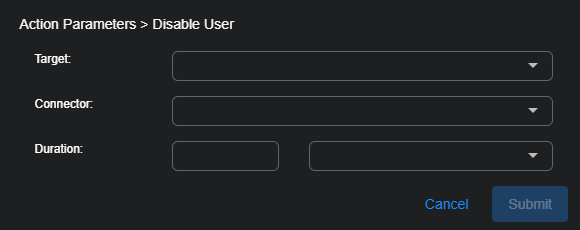
From the Case Response tab, select Disable User.
The Action Parameters | Disable User section appears.
-
Choose which user to disable.
Depending on the case, you might have only one option.
-
Choose the Connector.
-
Set the Duration.
You can choose Minutes, Hours, Days, or even Forever.
-
Select Submit.
The user is immediately disabled.
To enable a user after disabling, visit the User Actions tab (Automation | Action History | User Actions) to revert the disable action.
Run a Script
You can immediately respond to a case by running a saved script or creating a new script:
-
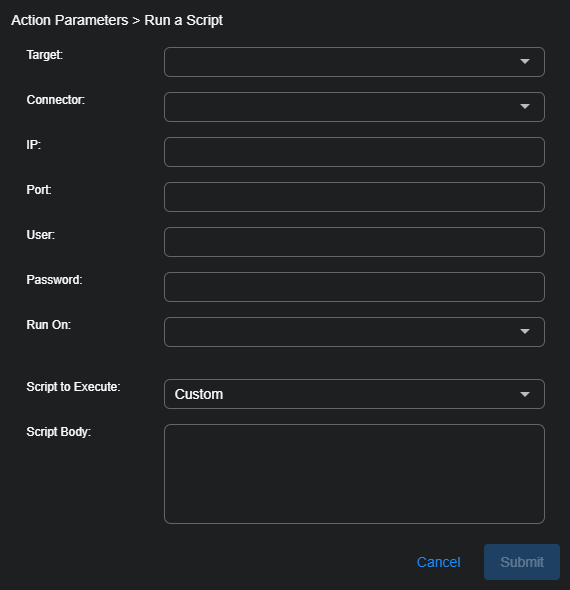
From the Case Response tab, select Run a Script.
The Action Parameters | Run a Script section appears.
-
Choose the Target remote host from the drop-down list.
The connection information is automatically filled in. The dropdown also includes the option to add a new remote host. If needed, select "create new remote host" as the target:
-
Specify the host name, address, port to connect to and the user credentials.
-
Specify whether to run the script on the Data Processor or a device sensor.
-
Note that the host is saved
-
-
Choose a script to execute from the drop-down list.
The script is automatically added to the Script Body field. To create a new saved script, see Creating a New Script.
You can also choose Custom and create a new script.
This new script will not be saved.
-
Select Submit.
The script is executed.
The script action appears in the Script Actions tab on the Action History page (Automation | Action History | Script Actions).
Contain Host
You can immediately contain (lock down or isolate) a host managed by certain services such as Bitdefender, Cynet, Cybereason, BlackBerry Cylance, SentinelOne, CrowdStrike Falcon, or Microsoft Defender for Endpoint. You must have previously configured a connector to that service in order to perform this action.
-
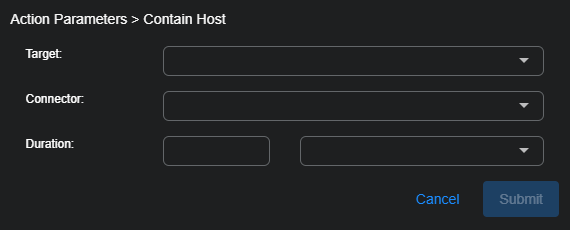
From the Case Response tab, select Contain Host.
The Action Parameters > Contain Host section appears.
-
Choose the Target.
This menu option allows you to specify the source or destination host associated with the event as the host you want to isolate or lock down. For Cybereason connectors, the Target Value is automatically populated with the ID of the Cybereason sensor. For all other connectors, the value is the IP address or MAC ID of that host.
The Connector field is automatically filled in with the connector that manages the chosen host.
-
Choose a Duration.
-
Select Submit.
The Contain Host action is reported in the Endpoint Actions tab (Automation | Action History | Endpoint Actions).
Depending on the originating connector, you may be able to revert a host containment from Stellar Cyber. If this is supported, a Revert button is displayed in the row for the containment action of the Automation | Action History | Endpoint Actions table. For supported connectors, using Revert triggers a Lift Containment action that is displayed in the same table. If the API for the managing service does not support a revert option then you need to use that product's UI to manage the host state.
Blackberry Cylance connector's Contain Host action automatically expires upon the requested duration but this action is not reported back to Stellar Cyber. The Endpoint Actions table reports that the containment was successful, but not expired.
If you use a Cynet connector to perform a response action on a host that is not in your Cynet list of hosts, the Automation | Action History | Endpoint Actions row for the action will indicate that with an error message such as: The remote server returned an error: (422) Unprocessable Entity.
Hide Host
The Hide Host response for CrowdStrike Falcon is not available from Case Management. It is still available from Event Details.
Disconnect Host
You can immediately disconnect a host managed by SonicWall Capture:
-
From the Case Response tab, select Disconnect Host.
The Action Parameters > Disconnect Host section appears.
-
Choose your SonicWall Capture service from the drop-down list.
You can add a SonicWall Capture connector from System | INTEGRATIONS | Connectors.
-
Choose a Duration.
-
Select Submit.
The host is disconnected from the network.
The action appears in the Endpoint Actions tab on the Action History page (Automation | Action History | Endpoint Actions).
Initiate Scan
You can immediately scan an asset managed by SonicWall Capture or SentinelOne.
-
From the Case Response tab, select Initiate Scan.
The Action Parameters > Initiate Scan section appears.

-
Choose the target (asset, device, or agent) from the available list.
The Connector field is automatically filled in based on the chosen target.
-
Select Submit.
A vulnerability scan of your selection is triggered immediately from the service associated with your connector.
The action appears in the Endpoint Actions page tab on the Action History page (Automation | Action History | Endpoint Actions).
Restart Machine
You can immediately restart a host managed by SonicWall Capture:
-
From the Case Response tab, select Restart Machine.
The Action Parameters > Restart Machine Configuration section appears.
-
Choose your SonicWall Capture service from the dropdown.
You can add a SonicWall Capture connector from System | INTEGRATIONS | Connectors.
-
Select Submit.
The host is immediately restarted.
The action appears in the Endpoint Actions tab on the Action History page (Automation | Action History | Endpoint Actions).
Shutdown Host
You can immediately shut down a host managed by SonicWall Capture or Cynet:
-
From the Case Response tab, select Shutdown Host.
The Action Parameters > Shutdown Configuration section appears.
-
Specify the target device on which you want to perform the action.
The Connector field is automatically filled in based on the chosen target.
-
Select Submit.
The host is immediately shut down.
The action appears in the Endpoint Actions tab on the Action History page (Automation | Action History | Endpoint Actions).
Update Device
You can upload JSON to run actions on a device known to a Forescout connector:
-
From the Case Response tab, select Update Device.
The Action Parameters > Update Device section appears.
-
Select the Target on which you want to run the Forescout connector update action.
The target can be one of these: Source Host, Destination Host, Source MAC, or Destination MAC.
The Connector field is automatically filled in based on the chosen target.
-
If your connector was created with default JSON, customize it now or skip this step.
Populate the JSON field with the action you want the connector to transmit to the Forescout app configured in the beginning of this procedure. Note that Stellar Cyber verifies general format of the JSON, not the logic. Following is an example based on ActionAPI-supported JSON properties:
{
"connect_actionapi_vlan_assign":true,
"connect_actionapi_vlan_assign_id":"vlan233"
}
Do not include the IP or MAC address, as that is added automatically based on your selection in the previous step. The JSON that is transmitted to Forescout will include the IP or MAC and the property tag, similar to the sample below.
{
"mac":"009027390a7c",
"properties":{
"connect_actionapi_vlan_assign":true,
"connect_actionapi_vlan_assign_id":"vlan233"
}
}
Refer to Forescout documentation for supported fields and syntax details.
-
Select Submit.
The connector runs the update action one time.
Kill Threat
For assets managed by a SentinelOne service, if you have configured your connector for Respond actions, you can use this action to kill a threat.
-
From the Case Response tab, select Kill Threat.
The Action Parameters > Kill Threat section appears.
-
Then select the Target from the available list that is populated based on your connector selection.
The Connector field is automatically filled in based on the chosen target.
-
Select Submit.
A kill threat signal on the target is immediately triggered from the SentinelOne service associated with your connector.
The action appears in the Endpoint Actions tab on the Action History page (Automation | Action History | Endpoint Actions).
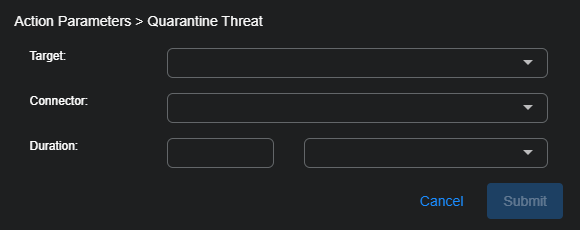
Quarantine Threat
For assets managed by a SentinelOne service, if you have configured your connector for Respond actions, you can use this action to quarantine a threat.
-
From the Case Response tab, select Quarantine Threat.
The Action Parameters > Quarantine Threat section appears.
-
Choose the Target from the drop-down menu.
The Connector field is automatically populated based on the chosen target.
-
Use the duration fields to specify the length of time to put the target in quarantine.
-
Select Submit.
A quarantine on the target is immediately triggered from the SentinelOne service associated with your connector.
The action appears in the Endpoint Actions tab on the Action History page (Automation | Action History | Endpoint Actions).
Remediate Threat
For assets managed by a SentinelOne service, if you have configured your connector for Respond actions, you can use this action to remediate a threat.
-
From the Case Response tab, select Remediate Threat.
The Action Parameters > Remediate Threat Configuration section appears.
-
Choose the Target from the drop-down list.
The Connector field is automatically populated based on the chosen target.
-
Select Submit.
A remediation signal on the target is immediately triggered from the SentinelOne service associated with your connector.
The action appears in the Endpoint Actions tab on the Action History page (Automation | Action History | Endpoint Actions).
Remediate Email
For deployments integrated with the Barracuda Email Security Service, you can use Stellar Cyber to create an incident in a Barracuda Forensics And Incident Response system.
-
From the Case Response tab, select Remediate Email.
The Action Parameters > Create Remediate Email section appears with some sections pre-populated from the JSON associated with the selected event.
-
Choose the applicable connector from the drop-down menu.
-
Optionally, specify whether to search for the email in previously Quarantined and Sent categories.
-
Specify which remediation actions to perform on the Barracuda response system.
-
Message Actions: Select None, Delete, or Quarantine.
-
Enable continuous quarantine: (Visible only when the message action is set to Delete or None) Select this option to request that the action continue for 72 hours after the initial remediation has completed.
-
Notify: Select this option to also send a warning email alert to the affected user.
-
Send summary: Select this to copy an incident summary to the configured security team.
-
-
Select Submit.
An incident is sent to the Barracuda Forensics And Incident Response associated with your connector.
The action appears in the Email Actions tab on the Action History page (Automation | Action History | Email Actions).
Case Actions by Connector
The available Case Actions depend on the connectors providing data on the observables in the case.
The following table indicates which connector respond actions are applicable for each external action, along with the requirements to enable that action. Specifically, certain connectors must be configured and the indicated fields in the Interflow must contain non-null, valid data.
|
External Action |
Connector and Data Requirement* |
Applicable Connectors |
||||||||||||
|---|---|---|---|---|---|---|---|---|---|---|---|---|---|---|
| Block IP / Block on Firewall |
At least one firewall or security switch connector is configured and required fields are populated
|
AWS, Barracuda Firewall, Check Point, Cisco FMC, Cisco Meraki, F5 BIG-IP ASM, F5 BIG-IP Firewall, F5 Silverline, Fortigate, HanDreamnet Security Switch, Hillstone, Palo Alto Networks Firewall, Palo Alto Networks Panorama, SonicWall Firewall, Sophos XG Firewall, Stormshield Network Security (SNS) Firewall |
||||||||||||
| Disable User |
Active Directory or Microsoft Entra ID (formerly Azure AD) connector required field |
Active Directory, Microsoft Entra ID (formerly Azure Active Directory) |
||||||||||||
| Confirm Compromised |
Microsoft Entra ID (formerly Azure AD) connector required field
|
|||||||||||||
| Dismiss Risk |
Microsoft Entra ID (formerly Azure AD) connector required field
|
|||||||||||||
| Run a Script | Always available | SSH Host | ||||||||||||
| Contain Host (Isolate Endpoint) |
One of the following connectors is configured. The required data varies based on connector to be used for response.
|
Bitdefender, CrowdStrike, Cybereason, Deep Instinct, BlackBerry Cylance, Cynet, Microsoft Defender for Endpoint, SentinelOne, Sophos Central, VMware Carbon Black |
||||||||||||
| Hide Host |
CrowdStrike required fields |
CrowdStrike | ||||||||||||
|
Forescout required fields |
||||||||||||||
| Initiate Scan |
|
|||||||||||||
|
SentinelOne required fields |
||||||||||||||
|
SentinelOne required fields |
||||||||||||||
| Remediate Threat |
SentinelOne required fields |
|||||||||||||
| Disconnect Host |
SonicWall Capture Client required fields |
SonicWall Capture Client | ||||||||||||
|
SonicWall Capture Client required fields |
||||||||||||||
|
SonicWall Capture Client required fields Cynet required fields |
||||||||||||||
|
Barracuda Email Security Service required fields |
||||||||||||||
|
N/A |
Universal Webhook Responder, ESET Responders |
