Editing Your User Profile 
You can edit your user profile directly from the main toolbar at the top of the Stellar Cyber UI. Select your account name on the menu bar and then select Profile.
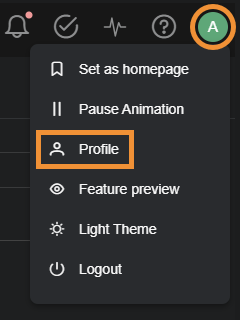
The User Profile window appears, allowing you to manage your profile, see your recent activities, and manage your API keys.

Managing User Settings in the User Profile Window
Use the following sections to understand the options available to customize your profile.
Identity
Although the system appears to let you edit the field, a User Name cannot be changed by you or another administrator. You can edit your Display Name, Phone Number, and Email Address.
Language Preference
You can change the language used in Stellar Cyber UI elements such as field labels, messages, and page names. This change takes effect immediately when you select Submit.
The Stellar Cyber UI is available in the following languages:
-
English
-
Español (México)
-
Français (Canadien)
-
Français
-
Bahasa Indonesia
-
日本語 (Japanese)
-
한국어 (Korean)
-
Português Brasileiro
-
ไทย (Thai)
-
Tiếng Việt (Vietnamese)
-
中文 (简体) - Chinese (Simplified)
-
中文 (繁體) - Chinese (Traditional)
While the UI supports 16 languages, logs must be sent to Stellar Cyber parsers in English. Reports can be generated in English, Japanese, or Chinese.
Password
This option does not appear for deployments configured with Single Sign On (SSO). For deployments with individual logins configured in Stellar Cyber:
-
Select your login name at the top of the page.
-
Select Profile.
The User Profile screen appears.
-
Select Change Password.
The password fields and requirements are displayed.
-
At least 8 characters
-
At least 1 uppercase letter
-
At least 1 lowercase letter
-
At least 1 number
-
At least 1 special character, such as: @ ! # $ % + / =
-
-
Enter your current password.
-
Enter your new password.
-
Reenter your new password.
-
Select Submit.
Your password is immediately changed.
You can now log out of Stellar Cyber and log in with your new password.
You can customize the Stellar Cyber UI in several ways.
User Scope & Privilege
You can change your scope and privilege. You cannot grant yourself a higher scope or privilege; an admin must do that from the User Management page.
Two-Factor Authentication
Enable this to use two-factor authentication (2FA) the next time you log in. You can also use this section to reset the status of your 2FA, which allows you to configure a different Authenticator application.
-
The overall Global Settings for 2FA affect authentication for partners and tenant users. For example, if 2FA is Mandatory, all users must use 2FA.
-
Enabling 2FA here is independent of what you have configured on your SSO service. Enabling it here causes a separate 2FA prompt to be displayed upon logging in to Stellar Cyber.
-
The 2FA page from Stellar Cyber refers to use of Google Authenticator, but other authenticator applications also work.
Recent Activities
To see your recent activities, select the Recent Activities tab at the top of the screen. A searchable, sortable list of recent activities appears. You can use the Export CSV button if you would like to import the log of recent activities into a spreadsheet application.
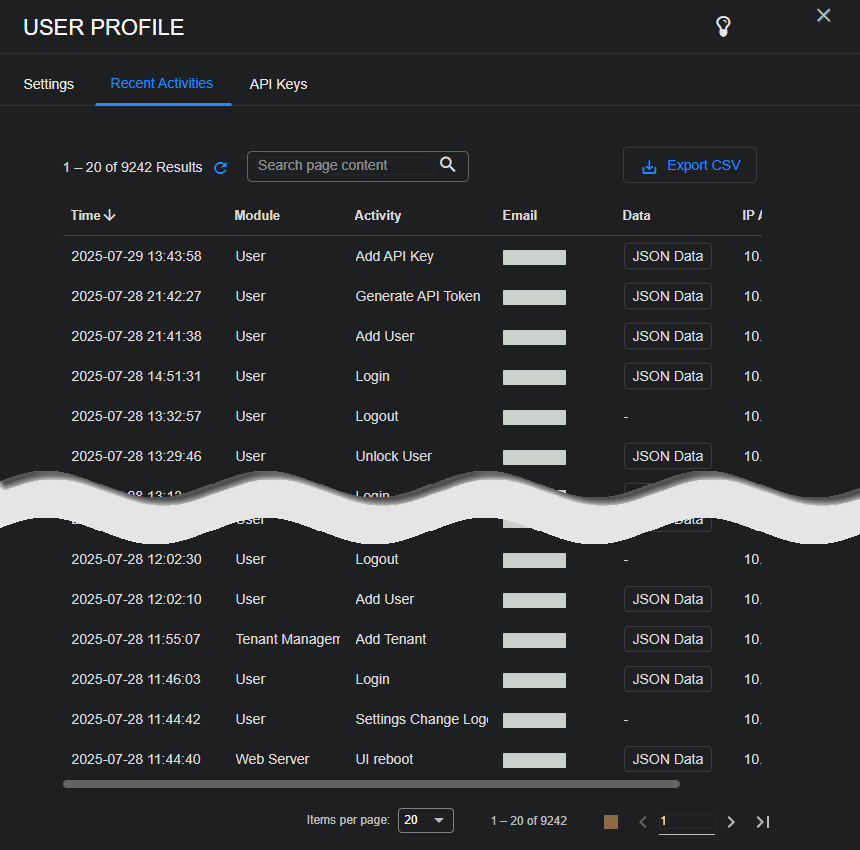
To see the JSON data corresponding to user activities, select JSON Data in the Data column for the corresponding activity. Note that logging out does not generate JSON data.
Managing Scoped API Keys in the 5.4.1 Release
The API Keys tab lets you create and revoke your personal keys used to access the Stellar Cyber API. The keys listed here are specific to your account and are limited by your user scope (tenancy) and RBAC privileges:
-
You can only make calls to the public API endpoints available to your RBAC privileges.
Certain public API endpoints are restricted to Super Admin users with root scope even when Scoped API Keys are enabled. Refer to Restricted Public API Endpoints for a list.
-
You can only access API data available to your account's user scope and tenancy. For example:
-
A partner user can access data for any of its associated tenants.
-
A tenant user can only access data for its own tenancy.
-
A root user can access data from the entire platform.
-
You use the API keys listed here to generate a JSON Web Token for access to the API.
Administrative users can also revoke keys for users with lower privileges than their own. You do that with the Edit User tool in the System | ORGANIZATION MANAGEMENT | Users page. They cannot, however, create a key for another user.
About API Keys
Releases prior to the 5.5.0 release granted public API access only to users with Root scope and Super Admin privileges. From 5.5.0, Stellar Cyber introduced per-user API keys, scoped to a user's RBAC privileges and tenancy. You can configure your own API Keys tab in the User Profile dialog box.
This implementation of API keys has the following benefits:
-
Respects the industry-standard principle of least privilege, only granting an API key the tools that it needs to perform the job you want it to do.
-
Allows easy breach isolation, with API keys tied to specific users.
-
Enables immediate key revocation to contain exposures quickly and limit the dwell time of any unauthorized access.
Stellar Cyber recommends that you consider creating service accounts scoped with only the RBAC privileges necessary to perform specific tasks. This way you can grant personnel just the access they need to perform specific API tasks.
Creating an API Key in the User Profile Window
Use the following procedure to create an API key in the User Profile window:
-
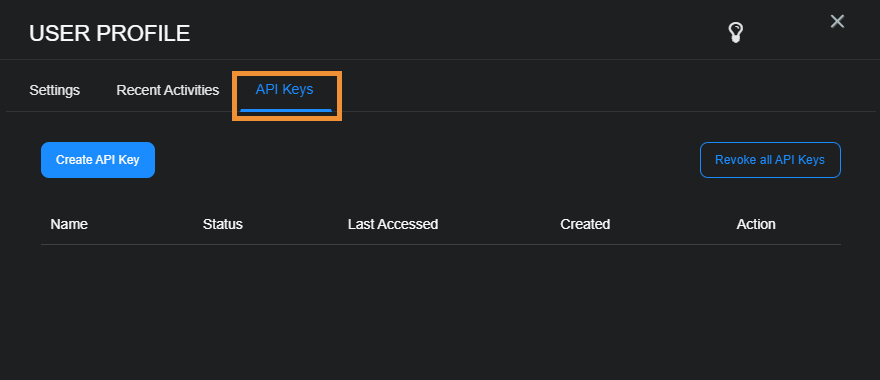
Select the API Keys tab in the User Profile window:
-
Select Create API Key to generate a new key for your account.
-
Supply a name for your key in the window that appears and then select Create.
Choose a name that is short and memorable so you can easily identify the purpose of the key in Stellar Cyber displays.
-
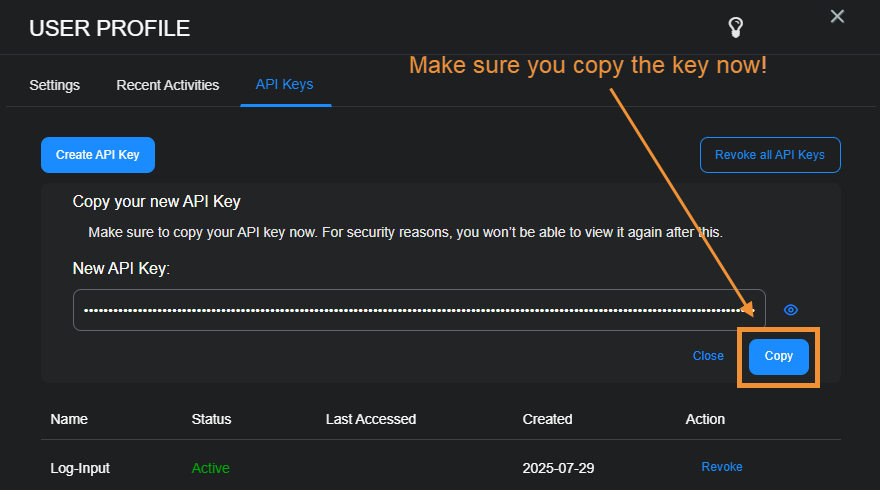
Use the Copy button to copy your API key now and store it somewhere safe.
For security reasons, you will not be able to retrieve the key from within Stellar Cyber later on.
If you do lose or forget your key, you can always revoke it and generate a new one. However, you'll also need to update any scripts that use the old key so that they'll continue to work with the new one.
-
After you copy the key, select Close.
The new key appears in the list with its name, status, and the last time it was accessed. In addition, a Revoke button appears in the Action column, allowing you to revoke a specific key on demand.
Revoking an API Key in the User Profile Window
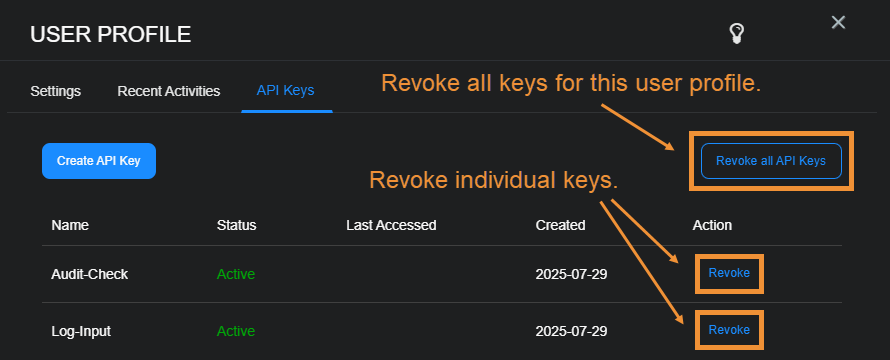
You can revoke your API keys in the User Profile window's API Keys tab:
-
Revoke an individual key by locating the key you want to revoke in the list and selecting Revoke in the Action column.
-
Revoke all of your API keys by selecting Revoke all API Keys at the top of the API Keys tab. Then, select Revoke all in the confirmation prompt that appears.
Revoked Keys Continue to Appear
Revoked keys continue to appear in the list of API Keys with a Status of Revoked for a few days after they have been revoked. This can be helpful when you need to remind yourself of which API keys you've revoked so you can update any scripts using the keys. Keep in mind, however, that once a key has been revoked, it cannot be reverted to Active.
API Keys and the Activity Log
Stellar Cyber records an entry in the Activity Log each time an API key is created or revoked.
