Adding Worker Nodes in the Stellar Cyber User Interface
Once you have configured a DL-worker and DA-worker in their respective CLIs, you are ready to add them in the Stellar Cyber user interface. Use the following steps:
Adding a DL-worker Node in the User Interface
Use the following procedure to add a DL-worker node in the Stellar Cyber user interface:
-
Once the show role command for the DL-worker reports Resource, log in to the DL-m's graphical user interface with a web browser. For example:
https://<DL-m Management IP Address>
-
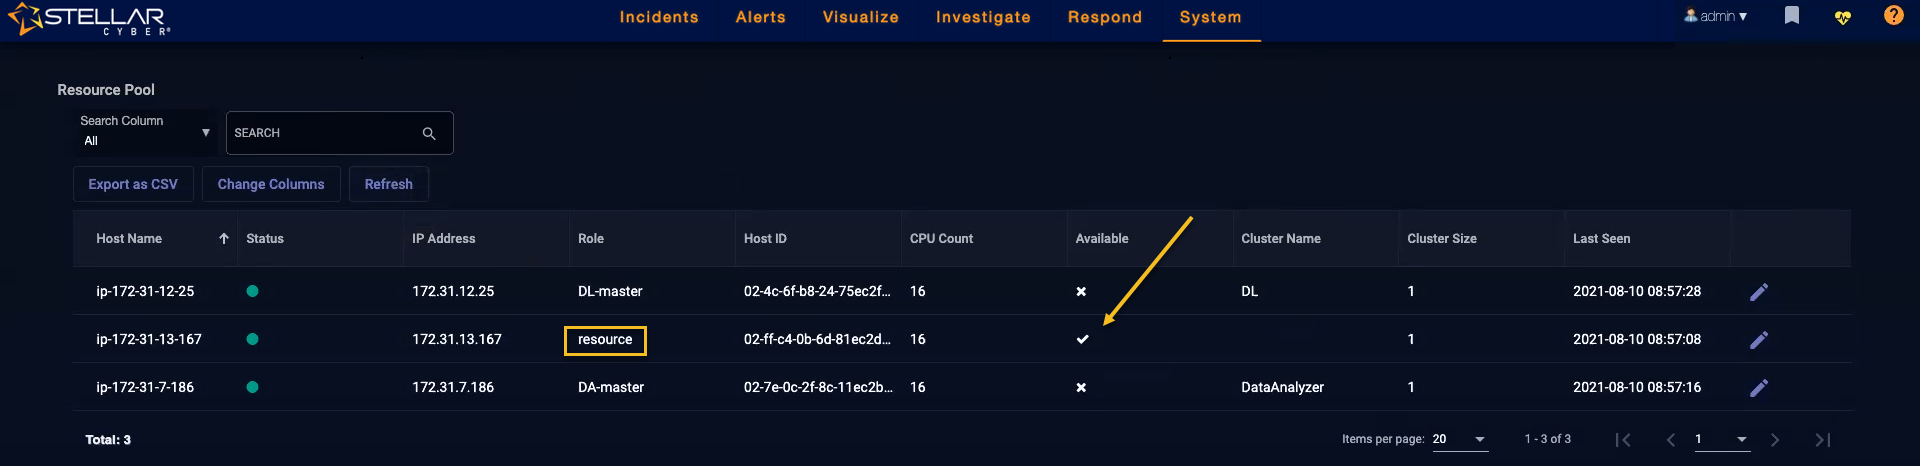
Navigate to the System | Data Processor | Resources page and make sure you see an entry with a Role of resource and a checkbox in the Available column, as illustrated below.
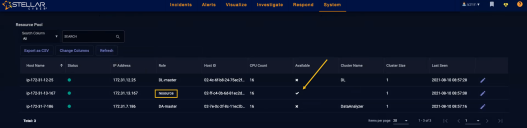
If the resource does not appear, it's possible that your AWS Security Group rules are preventing the DL-worker from adding itself to the DL-m. Make sure you've configured Security Group rules that open the necessary ports between the DL-worker and DL-m's private IP addresses.
Do not edit the resource directly in the System | Data Processor | Resource page. Instead, use the System | Data Processor | Data Lake page to convert the resource's role, as described below.
-
Navigate to the System | Data Processor | Data Lake page.
-
Click the Edit button for the Data Lake to which you want to add the DL-worker node.
The Scale Up Data Lake dialog box appears.
-
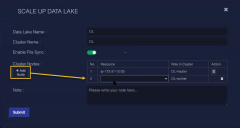
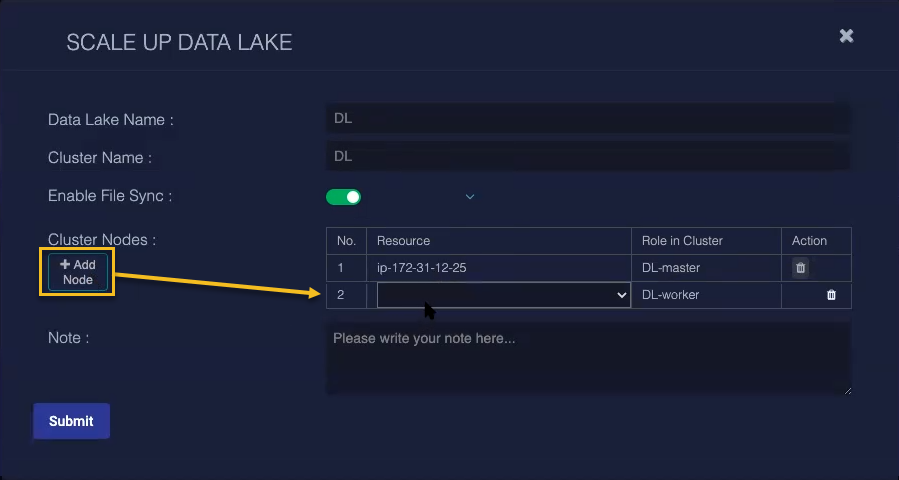
Click the Add Node button.
A new blank entry appears in the list of Cluster Nodes.
-
Use the Resource dropdown to select the DL-worker node you added in AWS and configured in its CLI. If you changed the hostname, it should be easy to identify; otherwise, you can use the IP address to identify it.
-
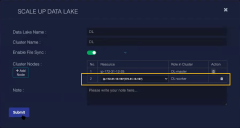
Set the Role in Cluster dropdown to DL-worker.
-
Click Submit.
-
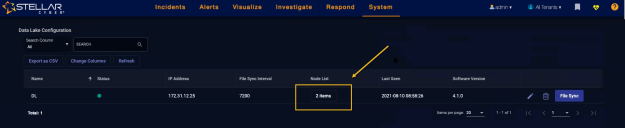
Wait a few minutes while Stellar Cyber sets up the cluster environment and then click the Refresh button in the Data Lake page.
-
The entry in the Node List column should increment to reflect the additional DL-worker node (for example, from 1 items to 2 items if this if the first DL-worker you've added).


Adding a DA-worker Node in the User Interface
Use the following procedure to add a DA-worker node in the Stellar Cyber user interface:
-
Once the show role command for the DA-worker reports Resource, log in to the DL-m's graphical user interface with a web browser. For example:
https://<DL-m Management IP Address>
-
Navigate to the System | Data Processor | Resources page and make sure you see an entry with a Role of resource and a checkbox in the Available column, as illustrated below.
Do not edit the resource directly in the System | Data Processor | Resource page. Instead, use the System | Data Processor | Data Analyzer page to convert the resource's role, as described below.
-
Navigate to the System | Data Processor | Data Analyzer page.
-
Click the Edit button for the Data Analyzer to which you want to add the DA-worker node.
The Scale Up Data Analyzer dialog box appears.
-
Click the Add Node button.
A new blank entry appears in the list of Cluster Nodes.
-
Use the Resource dropdown to select the DA-worker node you added in AWS and configured in its CLI. If you changed the hostname, it should be easy to identify; otherwise, you can use the IP address to identify it.
-
Set the Role in Cluster dropdown to DA-worker.
-
Click Submit.
-
Wait a few minutes while Stellar Cyber sets up the cluster environment and then click the Refresh button in the Data Analyzer page.
-
The entry in the Node List column should increment to reflect the additional DA-worker node (for example, from 1 items to 2 items if this if the first DA-worker you've added).
At this point, the DL and DA are both scaled up with additional worker nodes. You can repeat this procedure, starting with Launching the Worker Node Instances in AWS if additional capacity is required.
