Configuring XDR Connector
This topic covers a feature that is not available for all customers yet. See Early Access Program Features and Topics Under Development.
XDR Connect is a webhook ingestion method that makes it easy to integrate external data sources. It provides a scalable and standardized framework for rapid connector development and consistent data ingestion. Use XDR Connect to seamlessly integrate third party data sources into Stellar Cyber.
An XDR connector is a webhook-based custom connector. You configure the connector in the user interface, normalize the data, optionally define field mappings and enrichment rules, then POST events using the custom-generated webhook URL.
The XDR connector can be used to integrate a new data source particularly when:
-
the data is in JSON format
-
the third party vendor product can send the JSON data directly to a webhook URL
-
you want to optionally apply field mapping or custom enrichment rules
If the data must be retrieved through a vendor API rather than pushed via a webhook, you can use a custom script to post the data in JSON format or you can request a new native API connector from Stellar Cyber.
The data ingested through the XDR connector does not support third party alert integration or ML-based detections. You can use Automated Threat Hunting (ATH) rules for additional detections and custom alerts. Use the Enrichment step to add custom processing via Ruby functions.
See the following:
- Recommended Prerequisite
- Creating an XDR Connector
- Step 1: General
- Step 2: Normalization
- Step 3: Enrichment (Optional)
- Using the Output Preview Panel
- Validation Error Messages
- Testing Data Ingestion
- Editing a Connector
- What is Supported
Recommended Prerequisite
The partner/tenant user needs to have the Add/Edit/Delete XDR connector access in Role-Based Access Control (RBAC).
It is recommended that you use RBAC to configure a new role, such as XDR Ingestion Only. This role is restricted to only have the XDR Connector Ingestion capability, which is the Webhook (HTTP) POST capability.
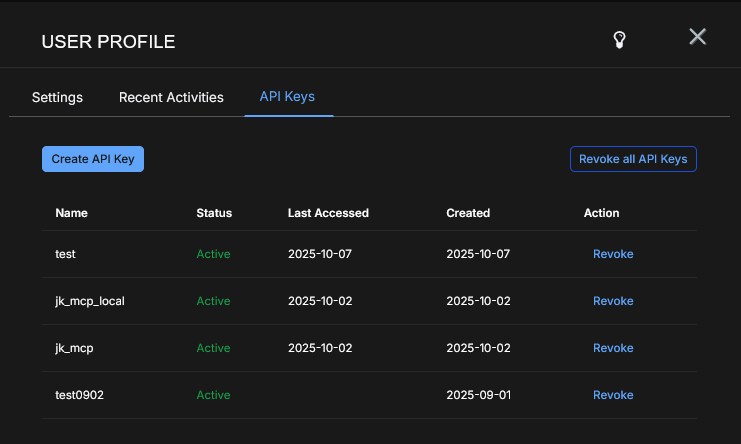
Administrators (Super Admin or Platform Admin) can set up an ingestion-only API key to restrict the amount of capabilities associated with that key.
API keys are identity-based, not connector-based.
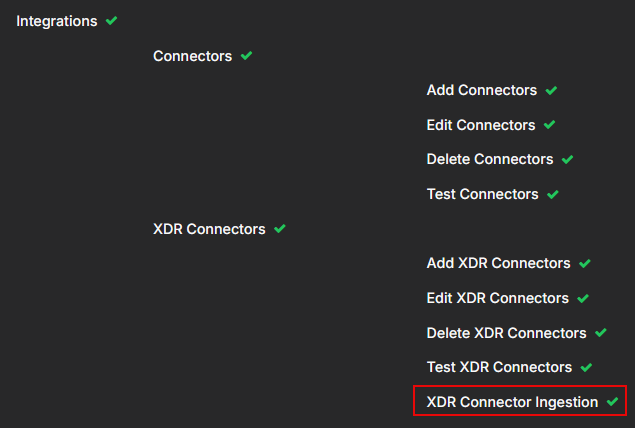
For RBAC, navigate to System | ORGANIZATION MANAGEMENT | Role-Based Access Control. See Configuring Role-Based Access Control.
For API keys, click your account name on the menu bar and select Profile. In the User Profile window, click the API Keys tab. See Editing Your User Profile.
Creating an XDR Connector
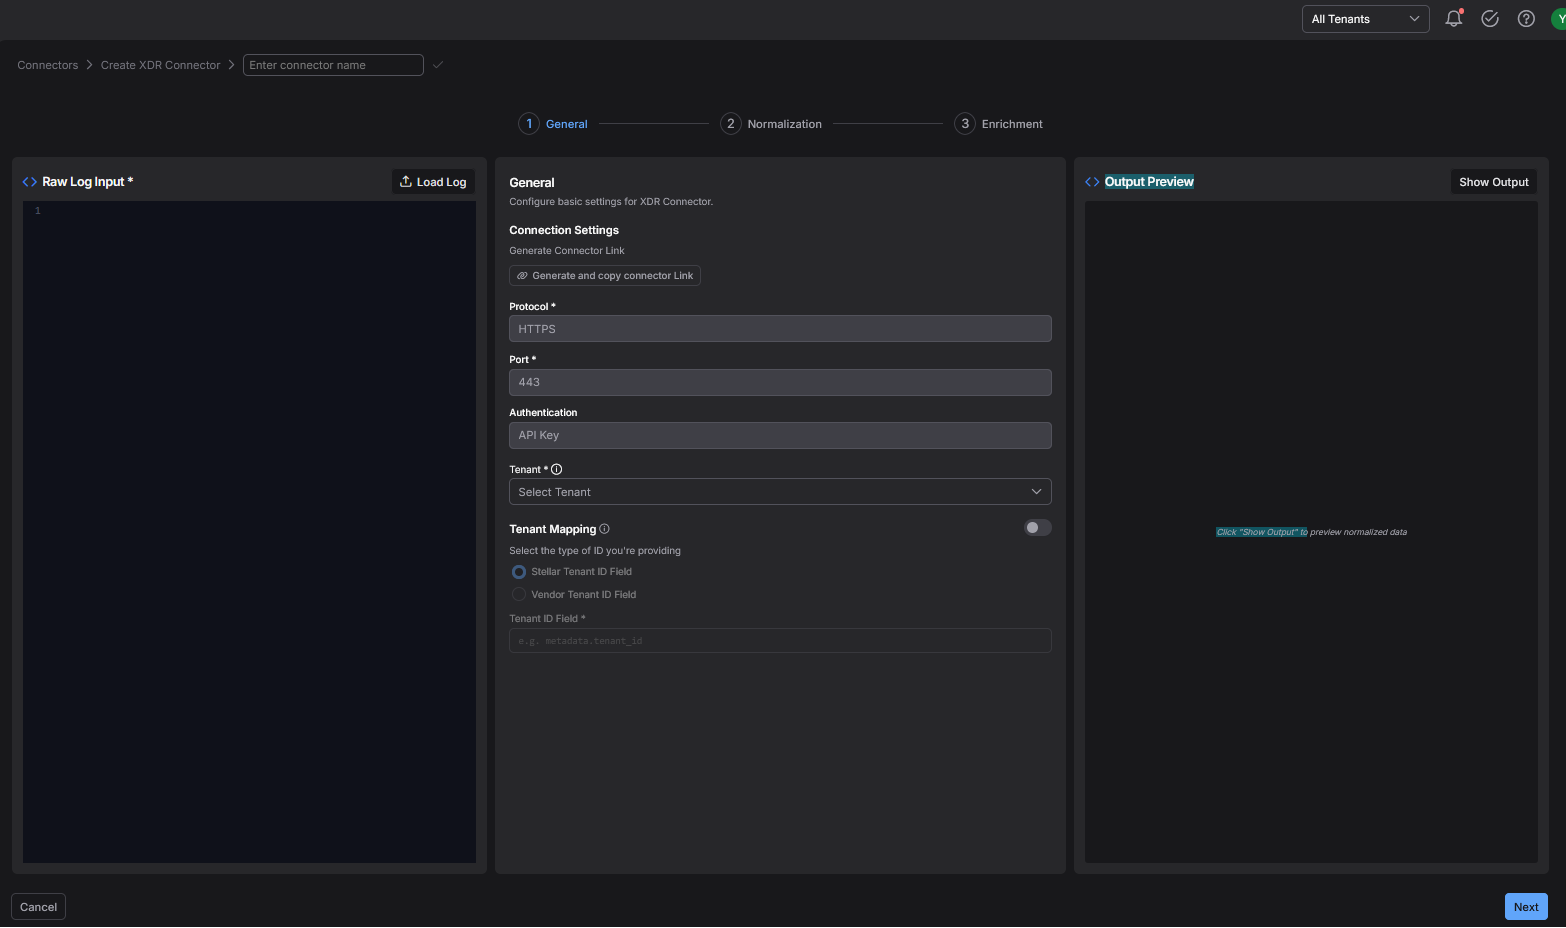
The XDR Connector creation wizard uses a unified three-step flow: General, Normalization, and Enrichment. All three steps share a three-panel layout:
-
Raw Log Input (left panel) — An editable JSON code editor that stays visible and editable throughout all steps. Use it to paste or load a sample event from your data source. The sample data drives the Output Preview.
-
Step Content (center panel) — The configuration fields for the current step. The center panel changes as you move between steps.
-
Output Preview (right panel) — Displays a real-time validation result when you click Show Output. The panel stays visible throughout all steps. See Using the Output Preview Panel.
To create an XDR Connector:
-
Log in to Stellar Cyber.
-
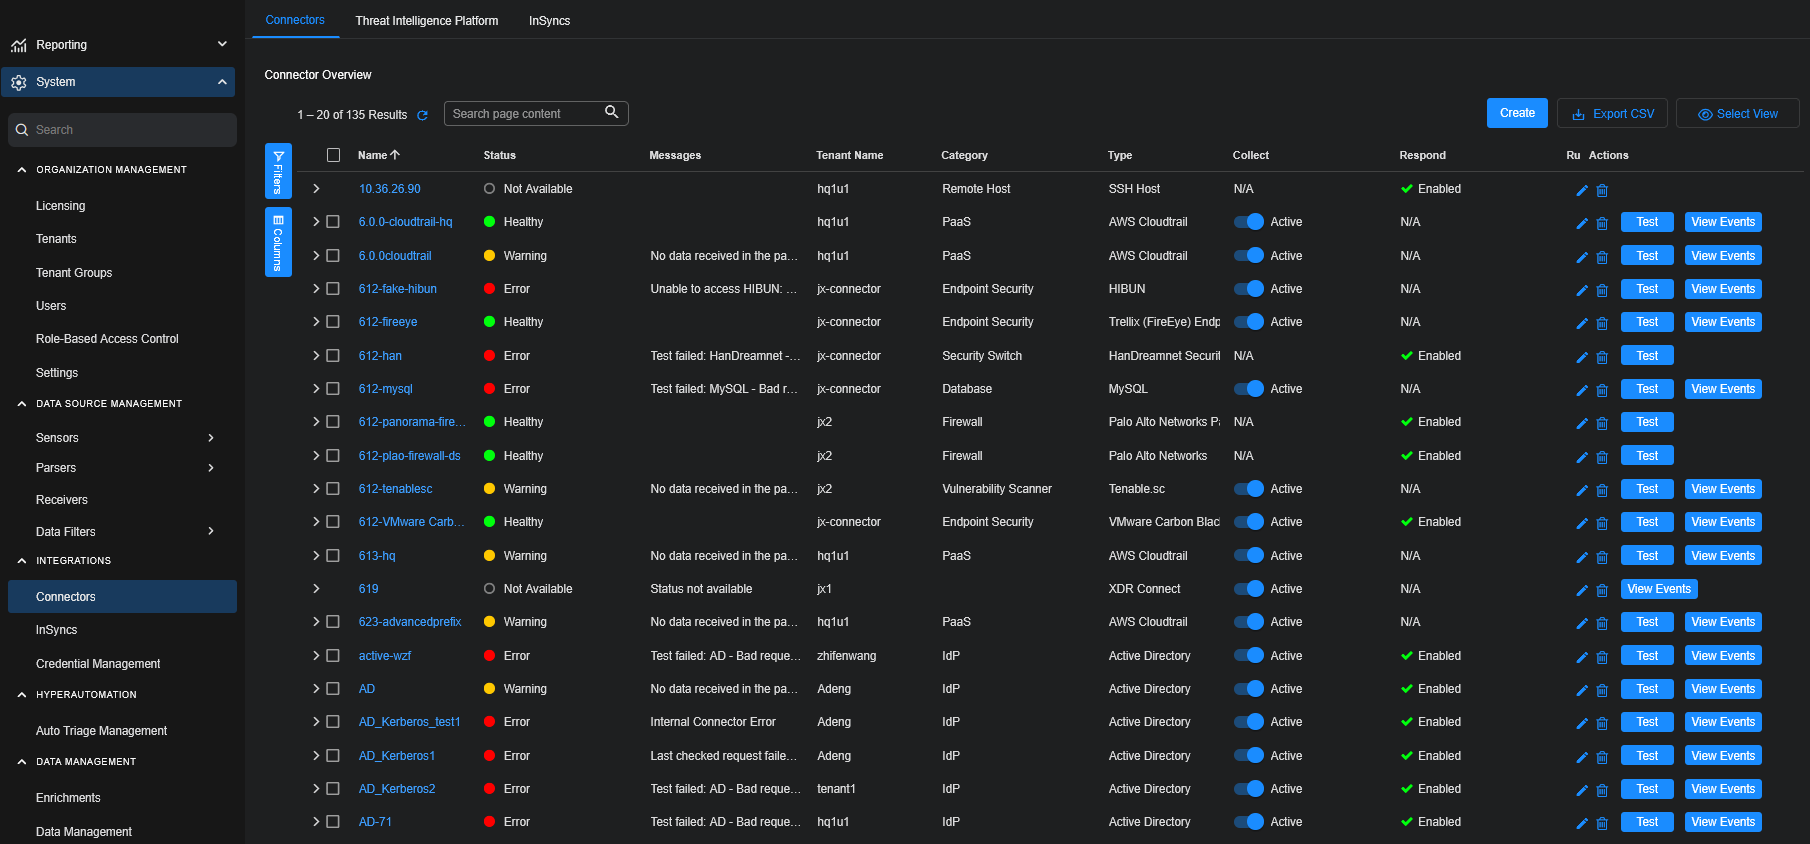
Click System | INTEGRATIONS | Connectors. The Connector Overview appears.
-
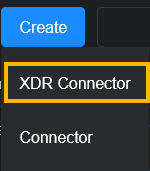
Click Create and select XDR Connector.
-
The creation wizard opens. At the top is Connectors > Create XDR Connector > Enter connector name. The numbered steps show: 1 General, 2 Normalization, and 3 Enrichment.

-
Enter a connector name using a clear and descriptive name to easily identify the connector. Use up to 50 characters: letters, numbers, underscores, and hyphens only. Spaces and special characters are not allowed. The connector name must be unique across all connectors.
-
In the Raw Log Input panel on the left, load or paste a sample JSON event from your data source. Click Load Log to upload a
.jsonfile, or type or paste JSON directly into the editor. The sample data is used later to preview normalization output.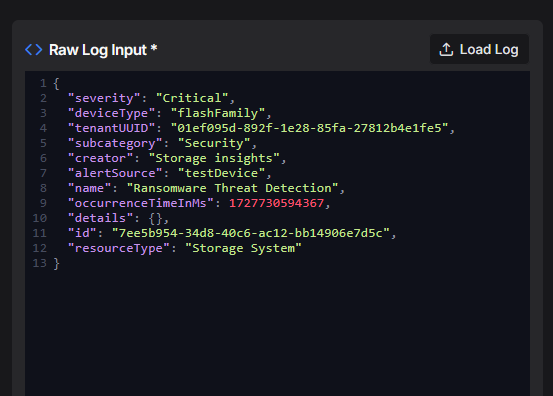
The Raw Log Input panel accepts only valid JSON. Invalid JSON is flagged with an error. The panel can be edited and is available across all three steps.
-
Complete Step 1 (General). See Step 1: General.
-
Complete Step 2 (Normalization). See Step 2: Normalization.
-
(Optional) Complete Step 3 (Enrichment). See Step 3: Enrichment (Optional). You can skip Step 3 by clicking Finish & Apply after Step 2.
-
After you click Finish & Apply, a success message is displayed and you are returned to the Connector Overview. You can now use the XDR Connector to test data ingestion. See Testing Data Ingestion.
Step 1: General
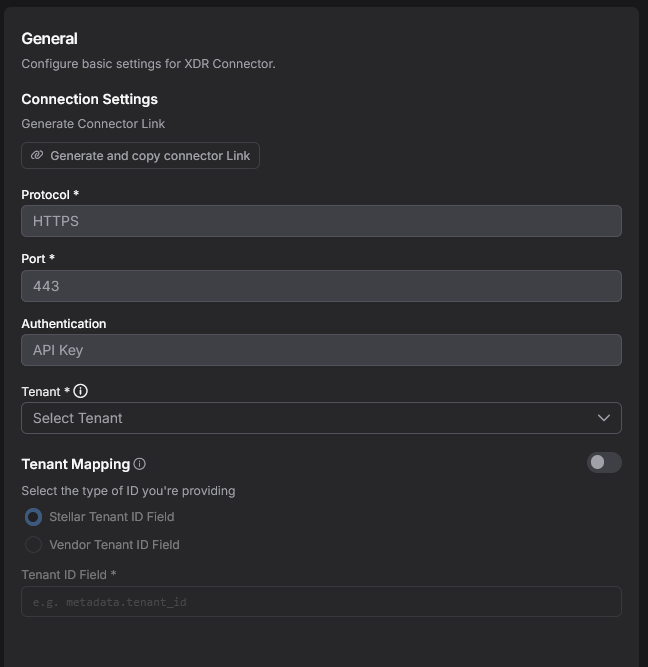
Step 1 configures the basic settings for the connector: the webhook connection details, the connector name, the target tenant, and optional tenant mapping for multi-tenant deployments.
Connection Settings
The Connection Settings section establishes the webhook endpoint for this connector.
-
Under Generate Connector Link, click Generate and copy connector Link. The system generates a unique webhook URL and copies it to your clipboard.
-
Review the read-only connection details. These values are fixed and cannot be changed:
Field
Value
Protocol HTTPS Port 443 Authentication API Key Authentication uses your existing API token, which is stored in the API Keys tab of your User Profile. See Managing Users.
-
In the Tenant dropdown, select the tenant to ingest data into. If you manage multiple tenants, select one tenant for this connector. By default, the tenant owns the connector and is assigned to every ingested event.
Tenant Mapping (Optional)
Use Tenant Mapping to route events to different tenants based on a tenant identifier embedded in the incoming JSON data. This is useful in multi-tenant deployments where a single webhook receives events for multiple tenants.
Read a tenant ID from each incoming event and route it to the matching Stellar Cyber tenant, so a single connector can deliver events to multiple tenants. Events without a resolvable tenant ID fall back to the default tenant previously selected.
-
Enable the Tenant Mapping toggle.
-
Select the type of ID you're providing:
-
Stellar Tenant ID Field — The incoming JSON contains a Stellar Cyber tenant ID directly.
-
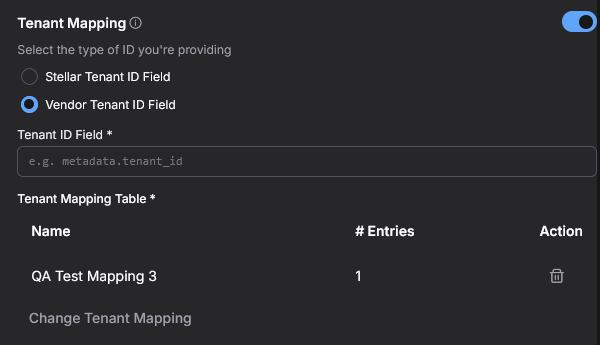
Vendor Tenant ID Field — The incoming JSON contains a vendor-specific tenant ID that must be mapped to a Stellar Cyber tenant. Selecting this option also requires you to configure a Tenant Mapping Table (see step 4).
-
-
In the Tenant ID Field, enter the dot-notation JSON path to the tenant identifier field in your incoming data. For example:
metadata.tenant_id. -
If you selected Vendor Tenant ID Field, configure the Tenant Mapping Table:
-
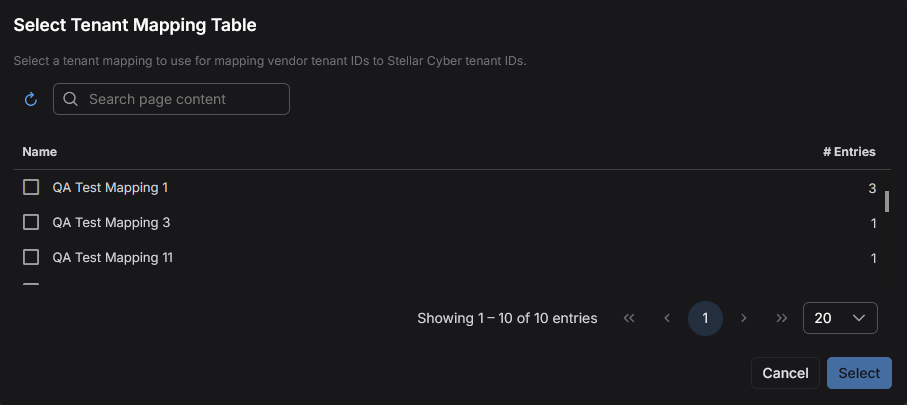
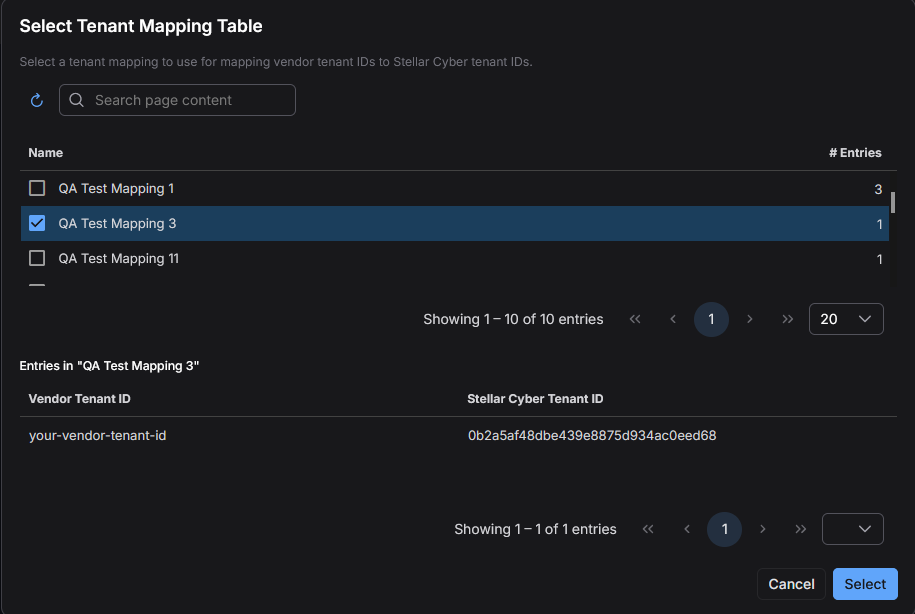
Click Select Tenant Mapping. The Select Tenant Mapping Table dialog opens, listing all available tenant mapping tables with their name and number of entries.
-
Use the search field to filter by name if needed. Select a single row from the list.
-
Click Select. The selected mapping table appears in the Tenant Mapping Table section, showing the mapping name and number of entries. To change the selection, click Change Tenant Mapping.
-
Completing Step 1
Click Next to proceed to Step 2. The circle for Step 1 shows a checkmark when all required fields are valid, or a red exclamation icon if any required fields are missing or invalid.
Step 2: Normalization
Step 2 configures how incoming data is normalized. It has three tabs: Vendor, Ignore Values, and Field Mapping.
Vendor Tab
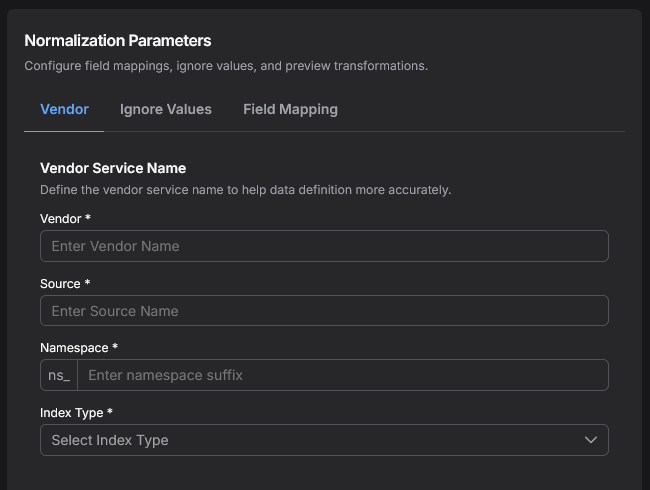
The Vendor tab identifies the data source and determines where the data is stored.
-
Under Vendor Service Name, enter the Vendor name. This is the name of the vendor associated with the data source, for example
microsoft_sentinelorpaloalto. Use up to 50 alphanumeric lowercase characters. Whitespace-only values are not allowed. -
Enter the data Source name. This identifies the specific product or log stream from the vendor, for example
auditlogorfirewall. Use up to 50 alphanumeric lowercase characters. Whitespace-only values are not allowed. -
In the Namespace field, enter the vendor namespace. The namespace holds ingested data from common sources, in JSON format, for a source vendor. It categorizes and organizes ingested data based on the originating vendor and product. The field has a standardized naming convention, prefixed with
ns_. Use only lowercase letters, numbers, and underscores for the namespace.If an existing namespace matches what you type, it appears in the dropdown. You can select an existing namespace or type a new one.
A namespace is not unique to one connector. Multiple connectors can share a namespace. The best practice is to keep data from a single vendor in one namespace. Examples are
ns_microsoftandns_paloalto. The Namespace field cannot be changed after the connector is created. -
In the Index Type dropdown, select the index type that matches your data. Incoming data is stored in the selected index. Indexes organize data to speed up searches. The following indexes are available:
Index
Details
AWS Events
AWS CloudTrail IDPS/Malware Sandbox Events IDS, Suricata, firewall threats from sensors or log forwarders, Maltrace SDS/Sandbox Linux Events Audit data from Linux agents, Google Workspace, and others Scans Vulnerability scanner results Syslog Syslog and Events Traffic
Network Traffic, flow traffic from sensors, CloudTrail traffic, firewall traffic logs from sensor log forwarders, DHCP server logs from sensors
Windows Events
User data from Active Directory, Microsoft Entra ID (formerly Azure Active Directory), and Office 365, and Windows logs from Windows agents, Windows System Security logs, and Windows events from third party SIEMs
The Index Type field cannot be changed after the connector is created.
Ignore Values Tab (Optional)
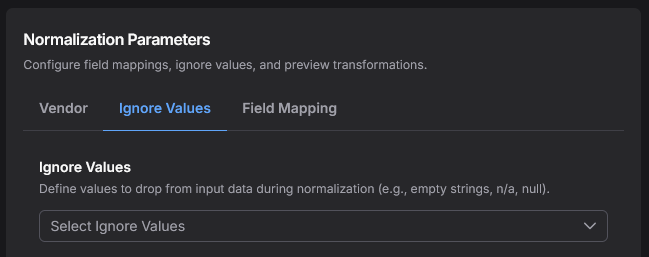
The Ignore Values tab lets you specify field values that should be dropped during normalization. This is useful for excluding empty or placeholder strings that carry no meaningful data, such as n/a, or null.
To add ignore values:
-
Click the Select Ignore Values field. Either select a checkbox for a field or type a value in the search box and press Enter. You can also paste a comma-separated list of values to add multiple entries at once.
-
The dropdown suggests common values:
""(empty string),n/a,-,null,N/A, andunknown. -
To remove a value, deselect the checkbox.
Ignore Values are optional. Any string is valid. No validation is applied to individual values.
Field Mapping Tab (Optional)
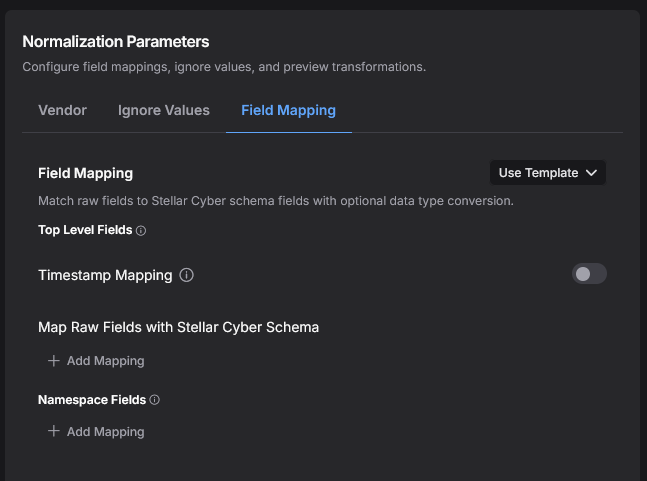
The Field Mapping tab lets you map raw JSON fields from your source data to Stellar Cyber schema fields, with optional data type conversion. All mappings in this tab are optional.
Timestamp Mapping
By default, the time of data ingestion is used as the event timestamp. Use the Timestamp Mapping toggle to extract a timestamp from the incoming data instead.
-
Enable the Timestamp Mapping toggle. A row appears with three fields:
-
Raw Field — Enter the dot-notation path to the timestamp field in your JSON data. For example:
event.timestamp. The path must contain only alphanumeric characters, underscores, dots, and hyphens, with no consecutive dots and no leading or trailing underscores. -
Stellar Cyber Schema — Targets the
timestampStellar Cyber field for timestamp mapping (cannot be changed).
-
Type — Select the timestamp format used in your data from the dropdown. The options are:
-
UNIX_EPOCH — Unix epoch seconds (10 digits), converted to milliseconds
-
UNIX_MILLIS — Unix epoch milliseconds (13 digits), already in correct format
-
ISO8601_EXTENDED — ISO 8601 extended format:
%Y-%m-%dT%H:%M:%S%z -
ISO8601_BASIC — ISO 8601 basic format:
%Y%m%dT%H%M%S%z -
RFC3339 — RFC 3339 format:
%Y-%m-%dT%H:%M:%S%.%L%z -
RFC2822 — RFC 2822 format:
%a, %d %b %Y %H:%M:%S %z -
POSTGRESQL — PostgreSQL format:
%Y-%m-%d %H:%M:%S.%N -
MYSQL — MySQL format:
%Y-%m-%d %H:%M:%S -
WINDOWS_FILETIME — Windows FILETIME: 100-nanosecond intervals since 1601-01-01
-
SYSLOG — Syslog format (no year):
%b %d %H:%M:%S -
SYSLOG_YEAR — Syslog format with year:
%Y %b %d %H:%M:%S -
APACHE_COMMON — Apache common log format:
%d/%b/%Y:%H:%M:%S %z
-
-
If you specify a Timestamp Mapping, the event timestamp is extracted and set using the Raw Field path and the selected Type.
If you do not enable Timestamp Mapping, the time of ingestion is used as the event timestamp.
The Type dropdown is required when a Raw Field path is entered.
Map Raw Fields with Stellar Cyber Schema (Top Level Fields)
Use this section to map specific raw JSON fields to standard Stellar Cyber schema fields. Top level fields map to fields at the top level of the Stellar Cyber schema. Field mapping enables field-level normalization and aligns the schema for the ingested data.
-
Click + Add Mapping under Map Raw Fields with Stellar Cyber Schema. A new row appears with three columns:
-
Raw Field — Enter the field name from your source JSON data.
-
Stellar Cyber Schema — Select the target Stellar Cyber schema field from the dropdown.
-
Type — The data type is automatically entered based on the selected schema field, for example
string.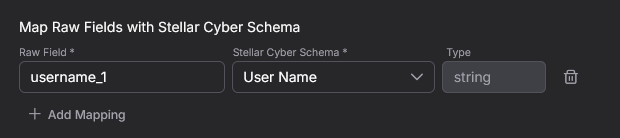
-
-
Click + Add Mapping again to add additional field mappings. To remove a mapping row, click the Trash icon on that row.
Namespace Fields
Use the Namespace Fields section to map raw fields to custom field names within the namespace. This is useful when you want to store source data under a field name that differs from the original JSON.
-
Click + Add Mapping under Namespace Fields. A new row appears with three columns:
-
Raw Field — Enter the field name from your source JSON data.
-
New Field Name — Enter the target name for the field in the namespace.
-
Type — Select the data type for the field. Options include: Integer, Timestamp, Epoch Timestamp, MAC Address, IP Address, String, and Object.

-
-
Click + Add Mapping again to add additional mappings. To remove a row, click the Trash icon on that row.
Use Template
Click Use Template to access template options:
-
Upload Template — Import field mappings from a JSON template file. The template is applied to the client-side only without an API call.
-
Download Template — Export the current field mappings as a JSON template file for reuse or sharing.
Completing Step 2
Click Next to proceed to Step 3 (Enrichment). You can also click Finish & Apply to save the connector and skip enrichment, which is optional.
Step 3: Enrichment (Optional)
Step 3 lets you define custom enrichment rules and custom fields using a Ruby function. The function is applied to each event after normalization, allowing you to add computed fields, perform lookups, or apply custom logic.
Ruby function notes:
-
The body of the Ruby function must include the following wrapper:
def _enrichment(record) … end. -
The Ruby function is used as a pass-through.
-
No validation is applied to the Ruby function until after submission.
Step 3 is optional and can be skipped by clicking Finish & Apply after Step 2.
-
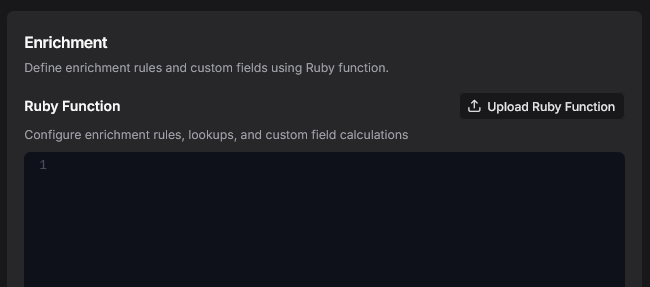
In the Ruby Function code editor, enter your enrichment function. The editor supports multi-line input. Alternatively, click Upload Ruby Function to load the function from a
.rbfile. The file content is loaded into the editor.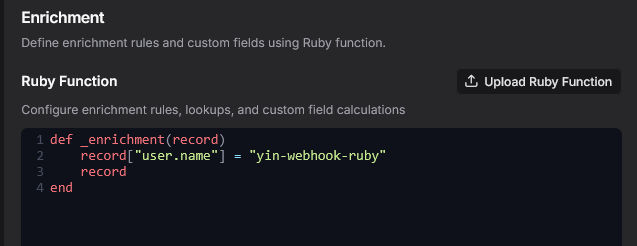
-
Click Finish & Apply to save the connector with enrichment, or click Back to return to Step 2.
Using the Output Preview Panel
The Output Preview panel on the right side of the wizard lets you validate your raw log input against the normalization pipeline and see the resulting field mappings, validation status, and performance metrics before saving the connector. The panel is available throughout all three steps.
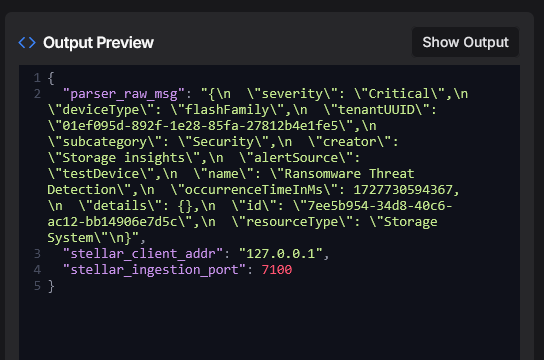
To preview output:
-
Make sure the Raw Log Input panel contains a valid JSON event. If the panel is empty when you click Show Output, the following error is displayed: Enter sample data in Raw Log Input first.
-
Click Show Output in the Output Preview panel header.
-
The panel displays the validation result as formatted JSON. The result includes field mappings, validation status, event counts, and performance metrics. If validation fails, the panel shows an error message prefixed with
Error:.Running Show Output is not required before submitting the connector. You can submit without previewing. If there are any validation errors, they will be shown after submission.
-
Click Finish & Apply.
Submit Prerequisites
The submission is blocked until all of the following are true:
-
Connector Name is filled and valid
-
Tenant is selected
-
Index Type is selected
-
Namespace is filled and valid
-
Webhook Link is generated
-
Vendor is filled
-
Source is filled
Use the Back button to go back to any panel to fix errors before submitting.
Validation Error Messages
The following error messages are possible during validation of the data sample.
Category of Error Message |
Name of Error Message |
Error Message Details |
|---|---|---|
|
Field Count Limit Errors |
Field limit exceeded |
|
|
Batch field limit exceeded |
|
|
|
Field Type Conflict Errors |
Type conflict within batch |
|
|
Individual field type conflict |
|
|
|
Incompatible field types |
|
|
|
Field Name Validation Errors |
Invalid characters in field name |
|
|
Field name too long |
|
|
|
Field name dot placement |
|
The following warnings are possible during validation of the data sample.
Category of Warning |
Name of Warning |
Warning Details |
|---|---|---|
|
Type Coercion Warnings |
Type coercion warning |
|
|
Field Value Warnings |
String value too large |
|
|
Large array warning |
|
Testing Data Ingestion
To test data ingestion, post data to the saved webhook URL. For example, you can use Postman, or any other tool that generates HTTP requests, to forward the data to the endpoint.
XDR Webhook Hostname
For the XDR webhook hostname, in general you use the standard domain for your instance in front of the webhook path. For example, if your domain is stellarcyber.ai, an example of the entire URL is:
https://stellarcyber.ai/webhook/xxxxxxxxxxxx
But if you use a Data Analyzer (DA), provide the DA name and port 8889. You can use any DA. For example, if you have a receiver called da1.example.com, the full URL with the hostname and path will include the receiver URL and port, for example:
https://da1.example.com:8889/webhook/xxxxxxxxxxxx
Example of Testing Data Ingestion
To test data ingestion (this example uses Postman):
-
Paste the webhook URL into the POST and set the Body to JSON with the request you are sending. This is how a third party system pushes events to Stellar Cyber.
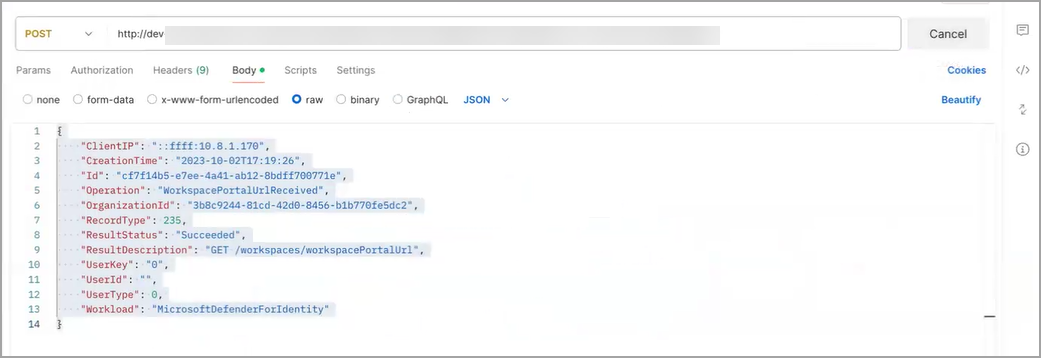
-
For Authentication, go to Headers and Authorization. The header format is Bearer token. Paste your existing API token.
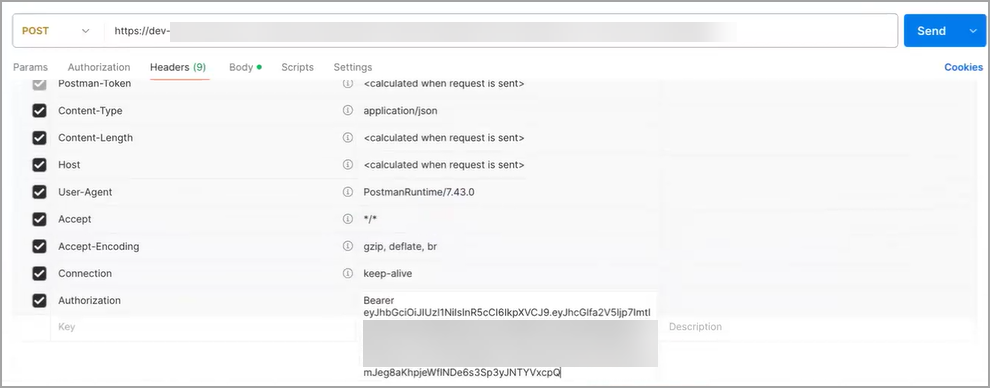
-
Click Send.
-
In the Connector Overview, locate your configured connector. The Type will be XDR Connect.

-
Once data is received, click View Events to see the new events.
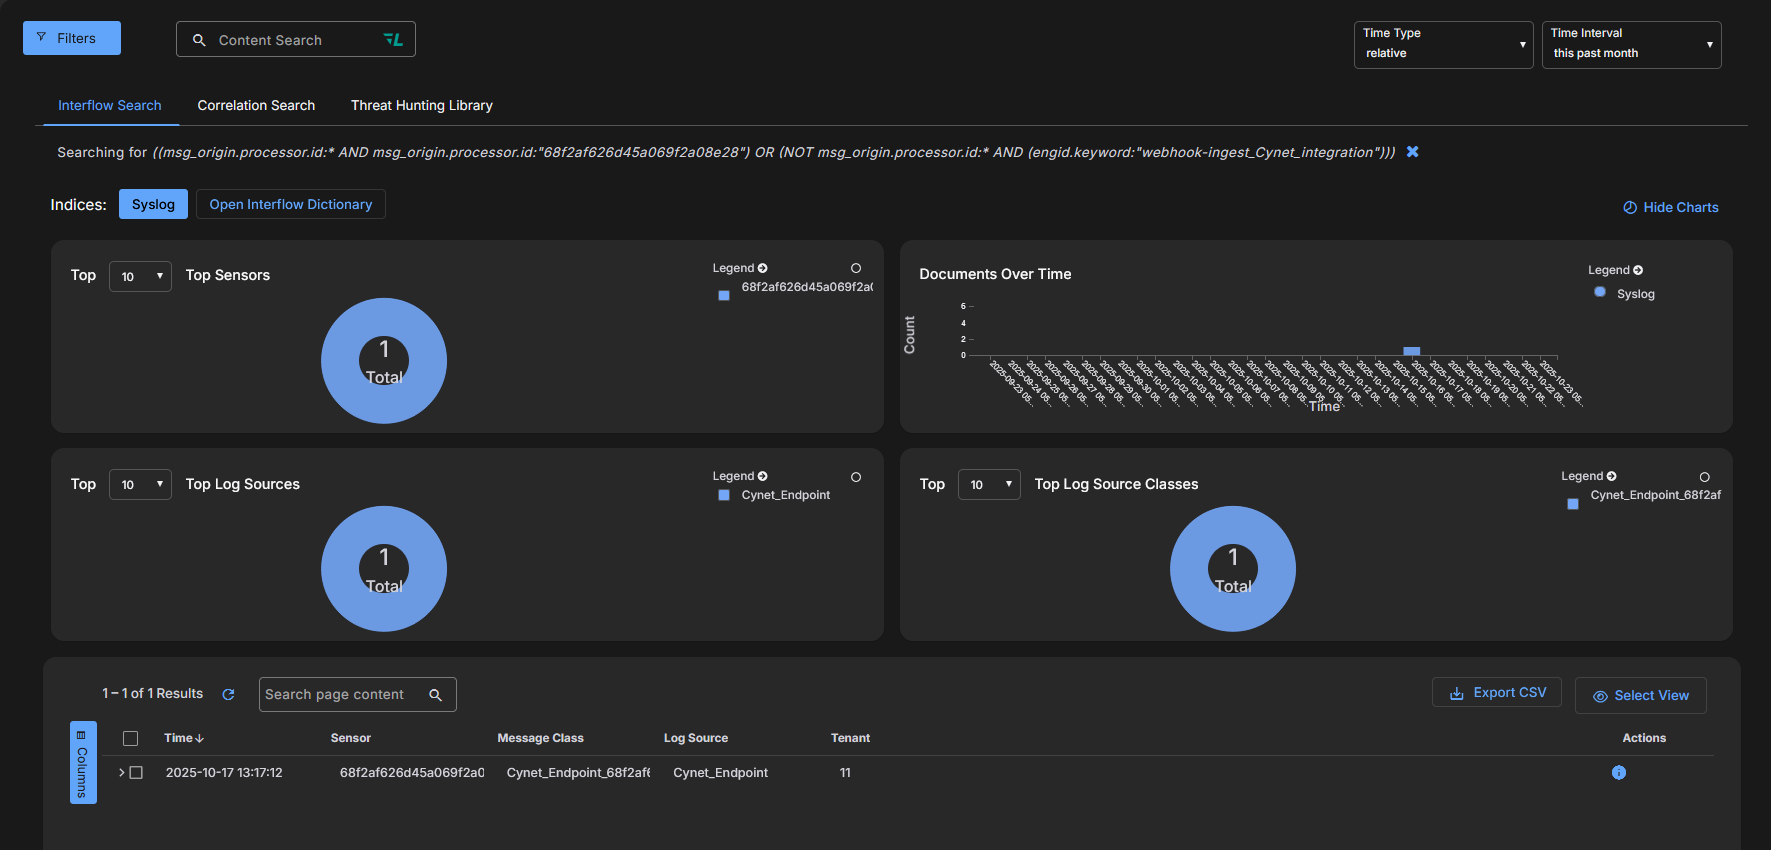
-
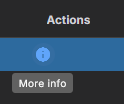
Drill down in the Event Details by selecting More Info. It is located in the Actions column of the connector table.
-
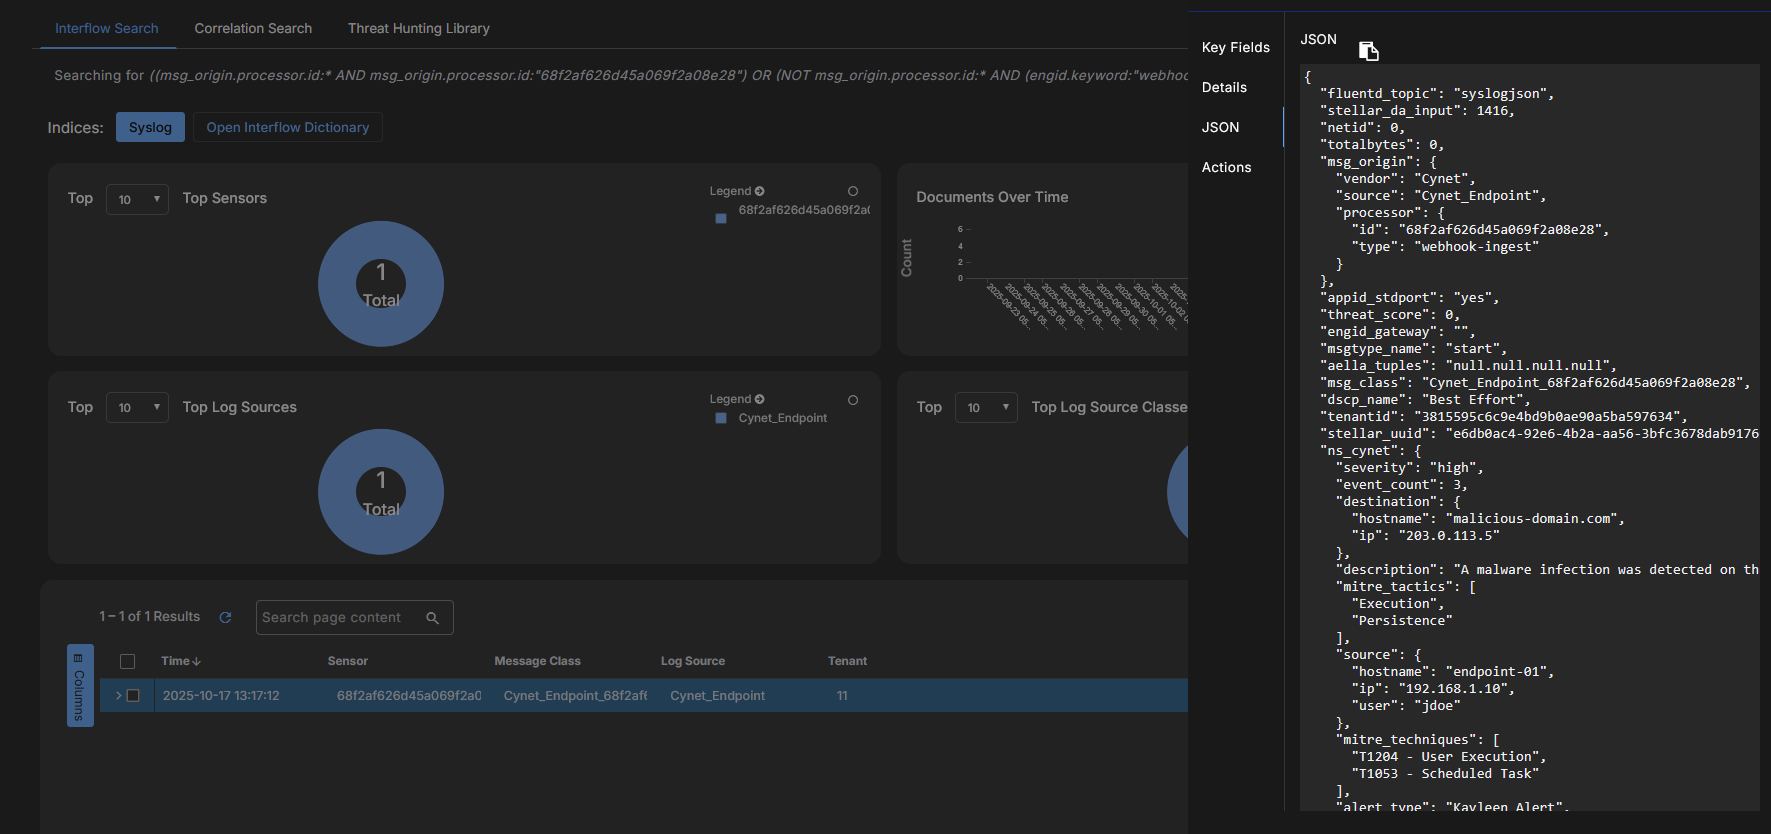
Click the JSON tab. You can verify the parsed fields, and ensure that data normalization is working correctly.
-
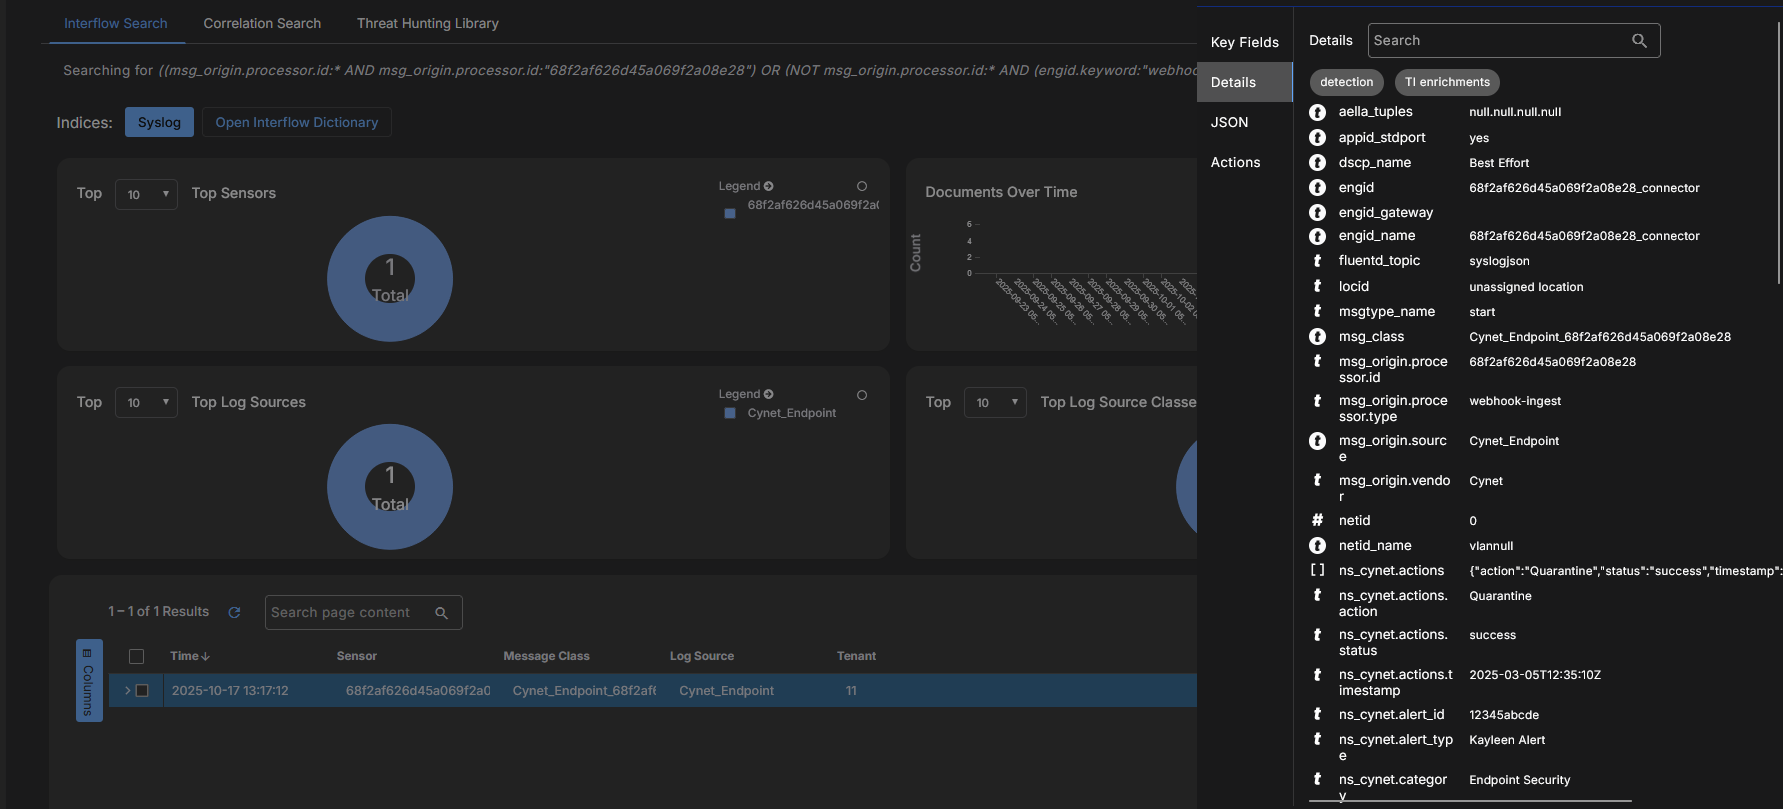
Click the Details tab to see the normalized fields.
Editing a Connector
To edit an existing connector:
-
In the Connector Overview, locate your configured connector. The Type will be XDR Connect.
-
Click the edit icon (
 ) on the row for your configured connector. It is located in the Actions column of the connector table.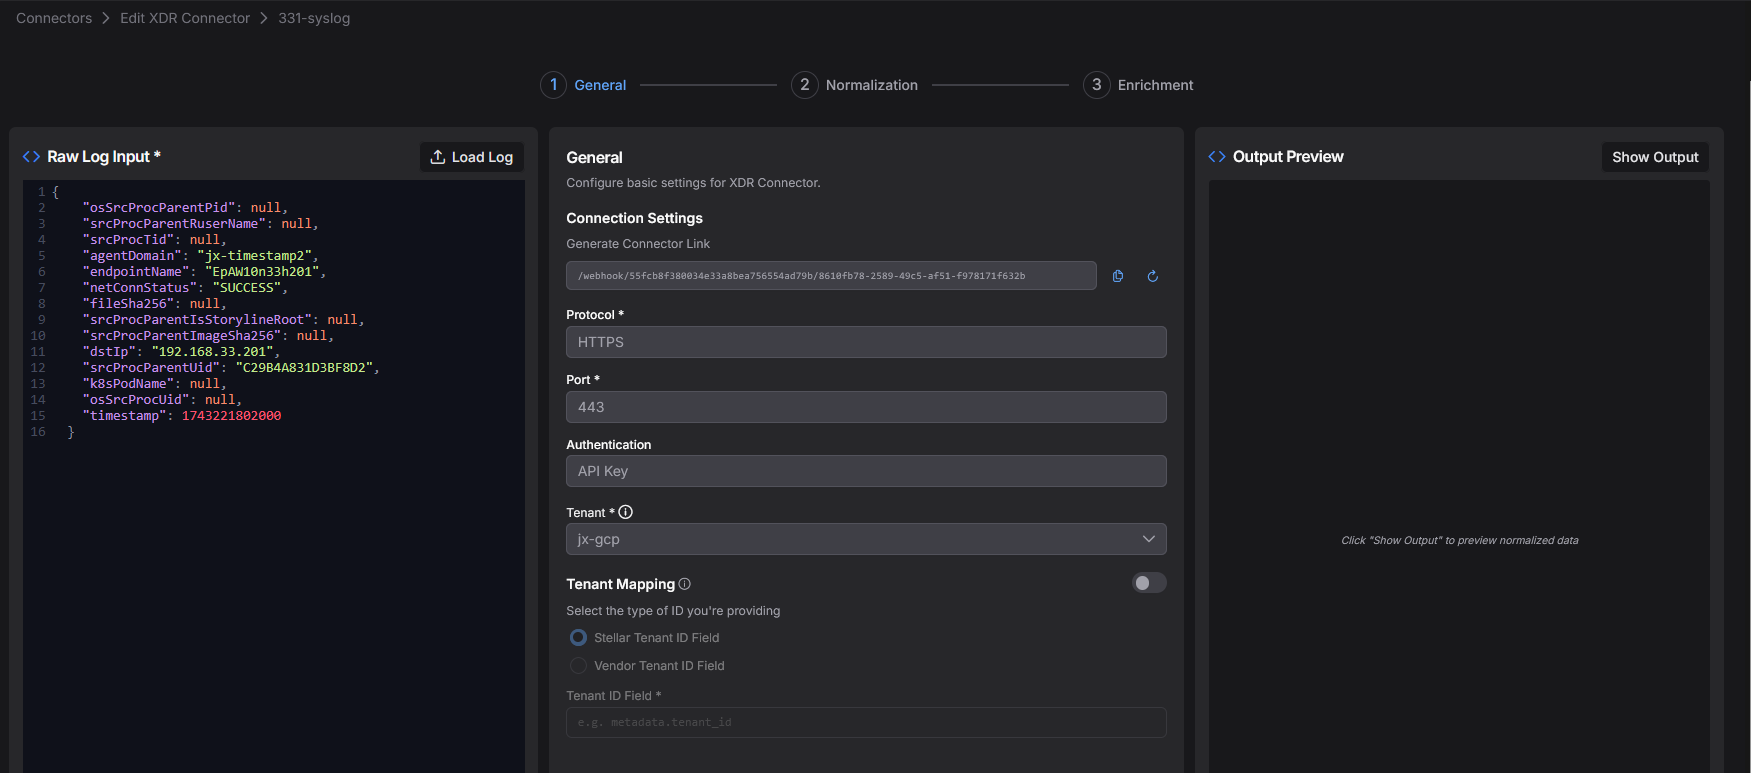
-
The wizard opens to the same three-step, three-panel layout used during creation. The following fields are pre-populated and cannot be changed in edit mode:
-
Connector Name — Read-only after creation.
-
Tenant — Read-only after creation.
-
Index Type — Read-only after creation (cannot be changed).
-
Namespace — Read-only after creation (cannot be changed).
The webhook link is pre-populated in edit mode. You can copy the existing link to the clipboard or regenerate the link.
-
-
All other fields are editable: Tenant Mapping settings, Vendor, Source, Ignore Values, Field Mapping (Timestamp, Top Level Fields, Namespace Fields), and the Enrichment Ruby function.
-
The Raw Log Input and Output Preview panels are pre-populated from the saved configuration. You can update the raw log sample and click Show Output to re-validate at any time.
-
After making changes, click Finish & Apply to save.
-
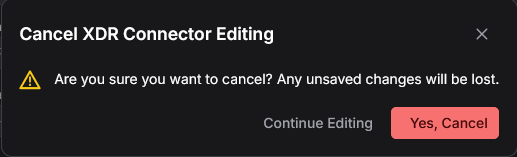
You can also click Cancel if you do not want to save your changes. You are asked to confirm.
What is Supported
This section details what is supported by XDR Connect in this release.
Protocols
-
HTTPS
HTTP Methods
-
POST
API Requests
-
A single API request is supported.
Authentication Method
-
A header-based authentication method is supported. A users' API token is used as a Bearer token for the ingestion.
Privileges
-
An API token with ingestion privilege.
API Token Expiration
-
90 days (recommendation)
Content Types
-
A single content type for each webhook is supported.
Deployed On
-
Data Processor (DP)
Tenants
-
A single tenant is supported per connector. Multi-tenant routing via Tenant Mapping is supported when a vendor tenant ID or Stellar tenant ID is present in the incoming JSON data.
RBAC
-
To create the configuration, the Root user (Super Admin) is supported.
Normalization
-
Level 1 (L1) normalization is supported. Field mapping and timestamp normalization are configurable in the Normalization step. Custom enrichment rules can be applied in the Enrichment step using a Ruby function.
Data Formats
-
Only well-formed JSON data is supported.
Enrichment
-
Custom enrichment via Ruby function is supported. Functions are uploaded or entered in the Enrichment step. Enrichment is optional.
Field Mapping
-
Top Level field mapping (raw field to Stellar Cyber schema) and Namespace field mapping (raw field to custom field name) are supported. Use JSON templates to save and load field mapping configurations.
