Configuring S3 External Storage
You can configure AWS S3 external storage locations for backup/restore and cold storage. You must configure the external storage location before using those features.
To configure S3 external storage:
- Create an S3 bucket.
- Create an IAM policy that grants only read/write permissions to the S3 bucket you created.
- Create an IAM user and attach the policy you created to it.
- Generate an access key and secret access key for programmatic access.
- Add external storage in Stellar Cyber
Stellar Cyber also provides an archive-cli.py script that helps you move data in cold storage back and forth between regular storage and archival class storage in AWS. Refer to Cold Storage Archive Support for more information.
Note that each external storage location added to the System | DATA MANAGEMENT | Data Management | Snapshop Storage Configuration page must use a different bucket.
Creating an S3 Bucket
To create an S3 bucket:
-
Log in to the AWS Management Console.
-
Create a general purpose bucket at Services | Storage | S3 | Create bucket.
-
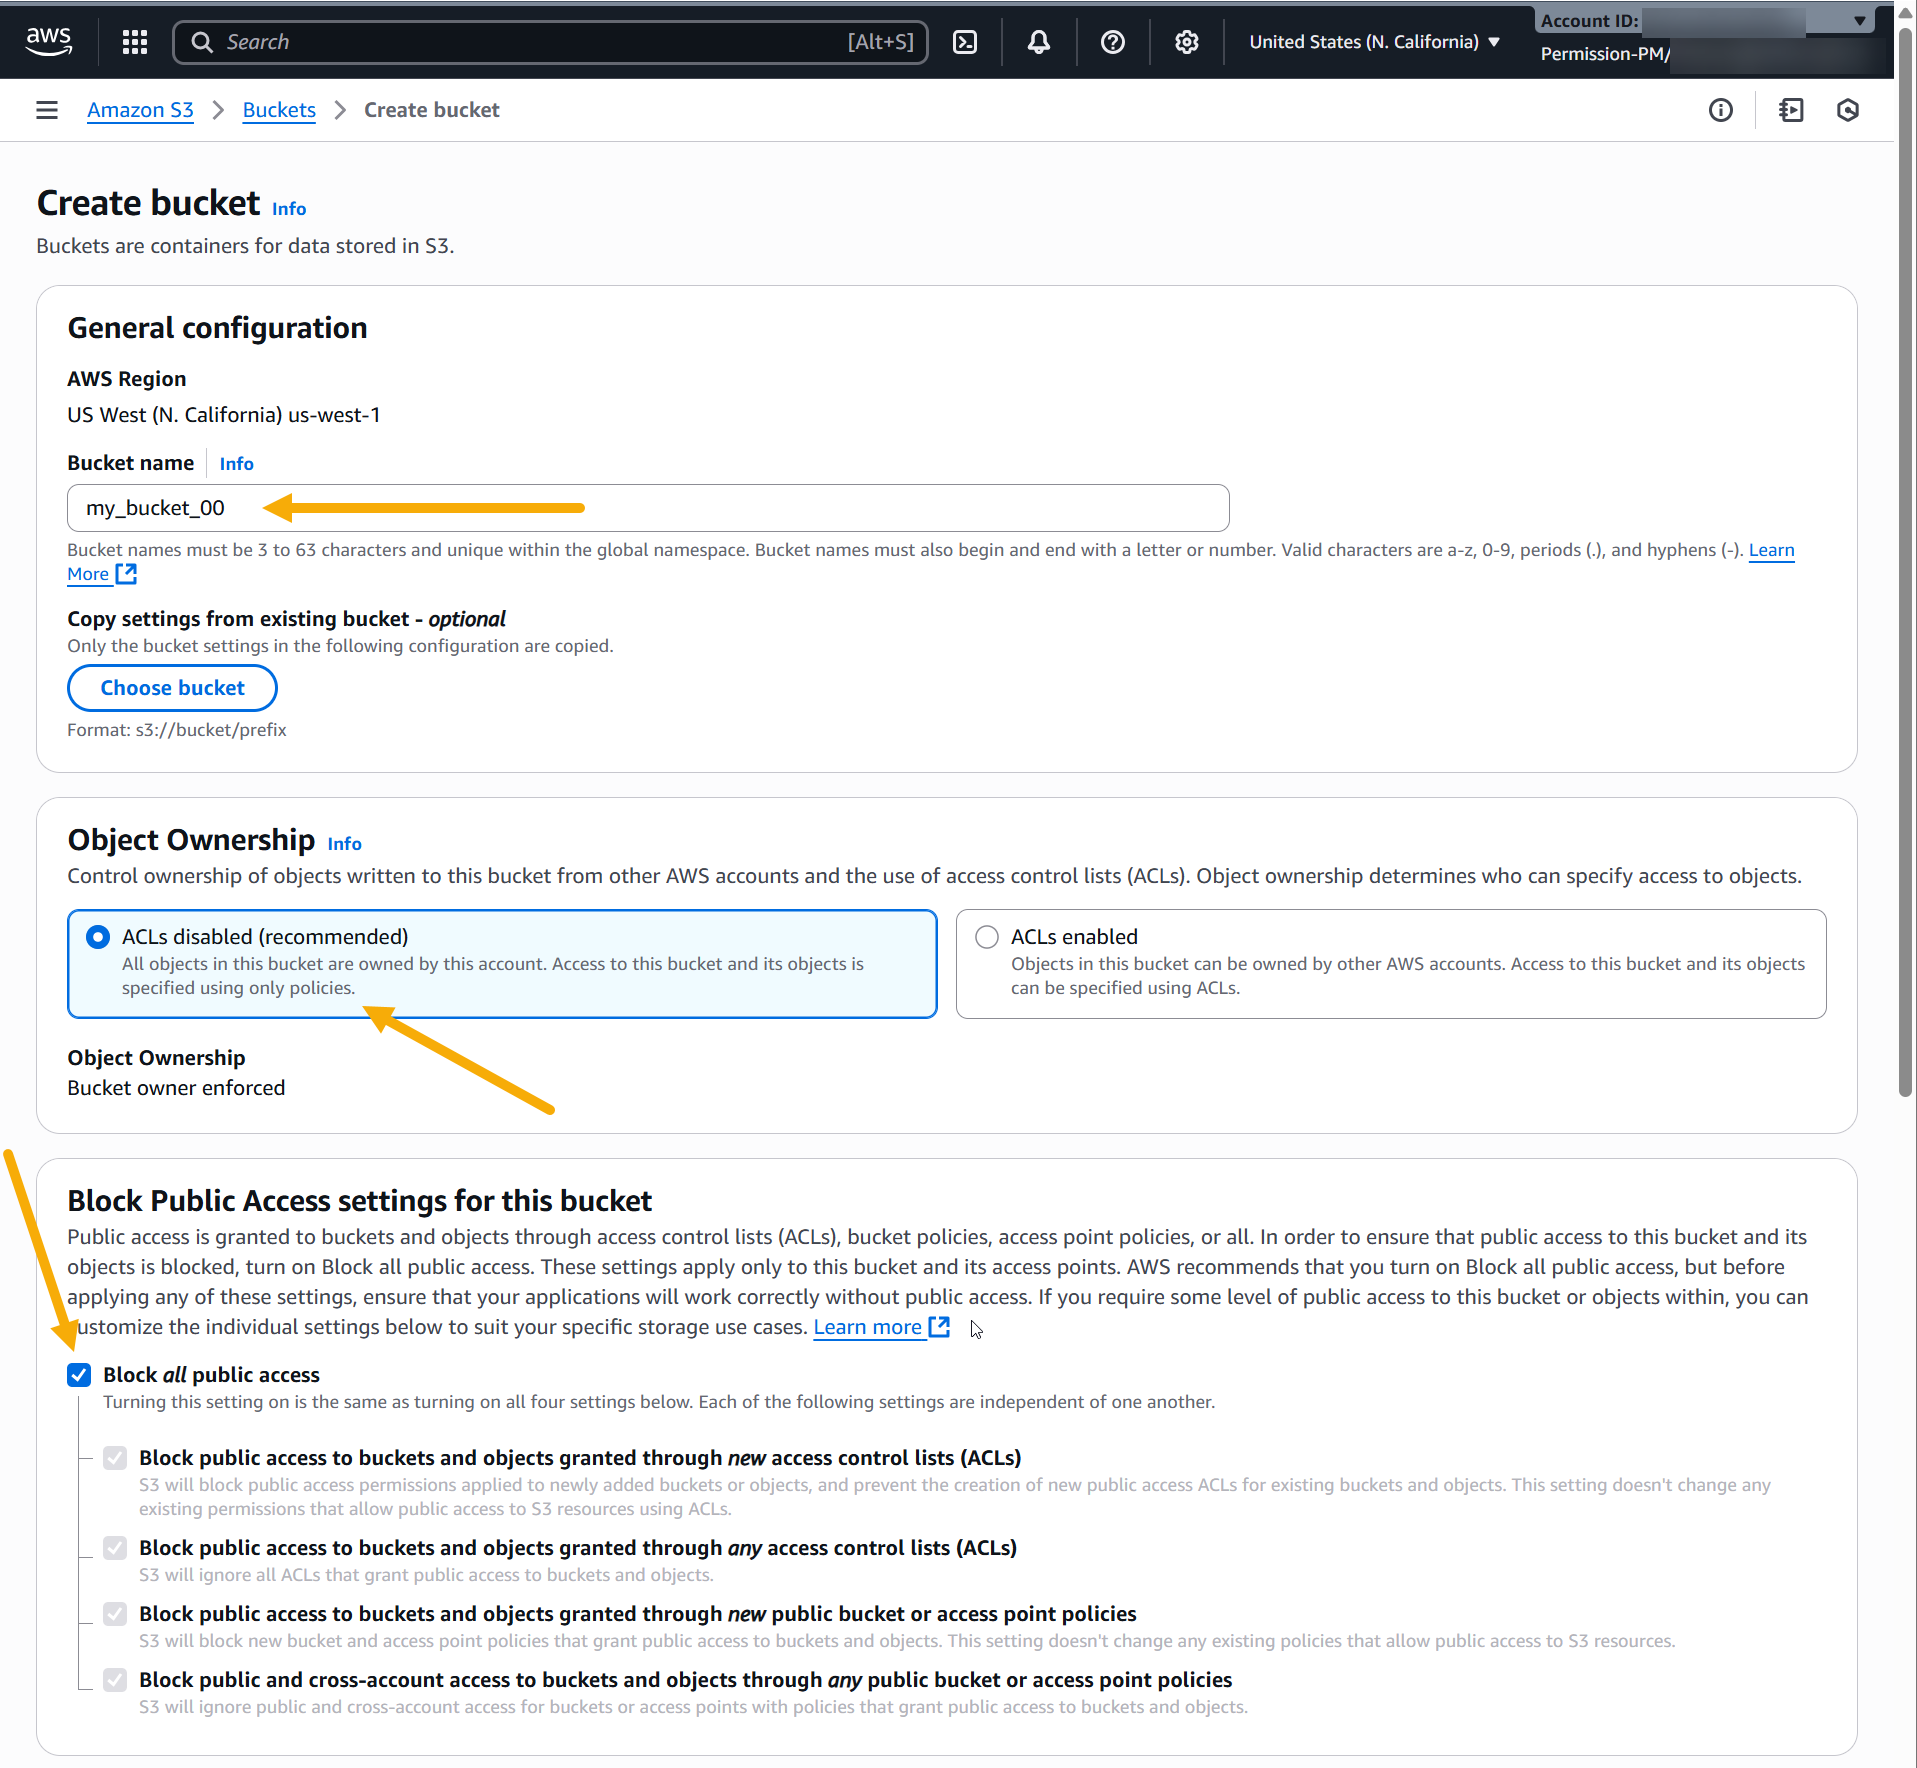
Supply a name for your bucket. We are using my-stellar-bucket in this example.
-
Leave Object Ownership set to ACLs disabled.
-
Leave the Block all public access option enabled.
The figure below illustrates our settings so far:
-
Click Create bucket to finish creating the bucket.
Creating an IAM Policy
Next, you need to create an IAM policy that grants only read/write permissions to the S3 bucket you created in the previous procedure:
-
Log in to the AWS Management Console if you're not still logged in.
-
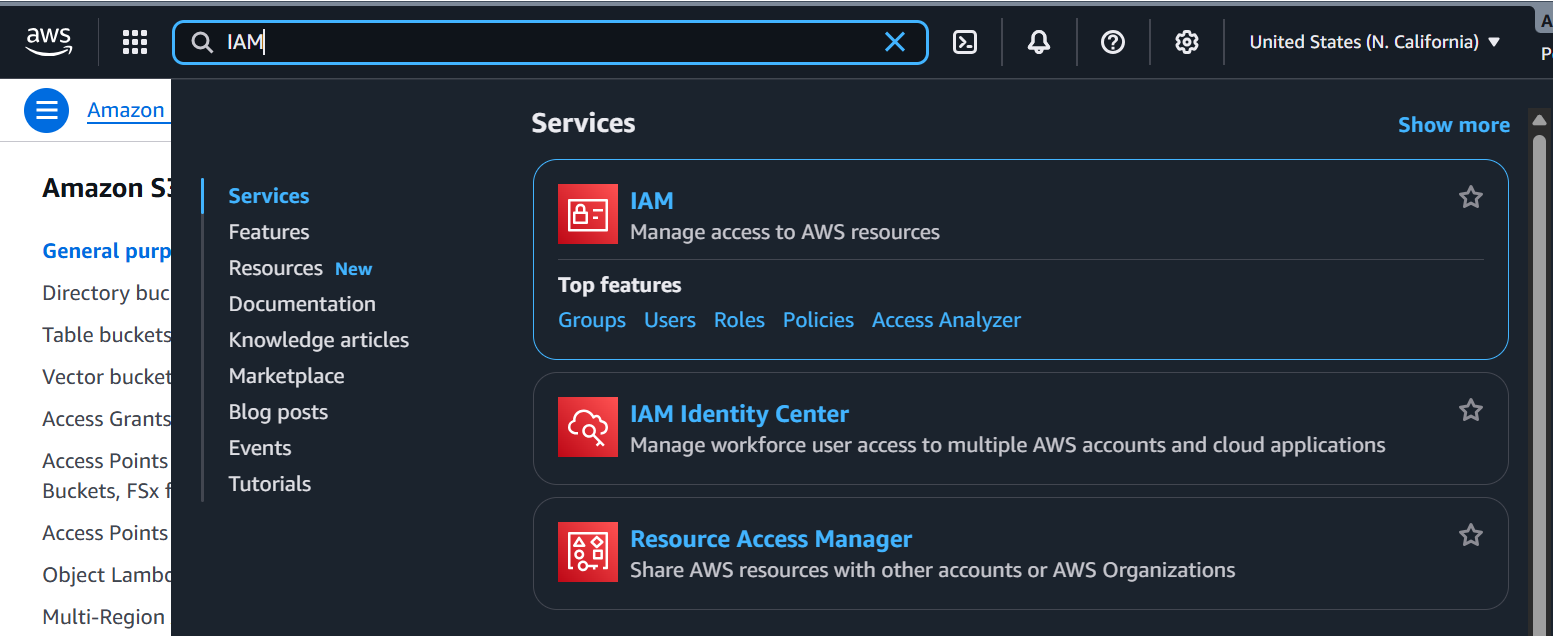
Search for IAM in the Services search bar at the top of the display and launch the IAM Console. For example:
-
Click the Access Management | Policies entry in the left navigation panel.
-
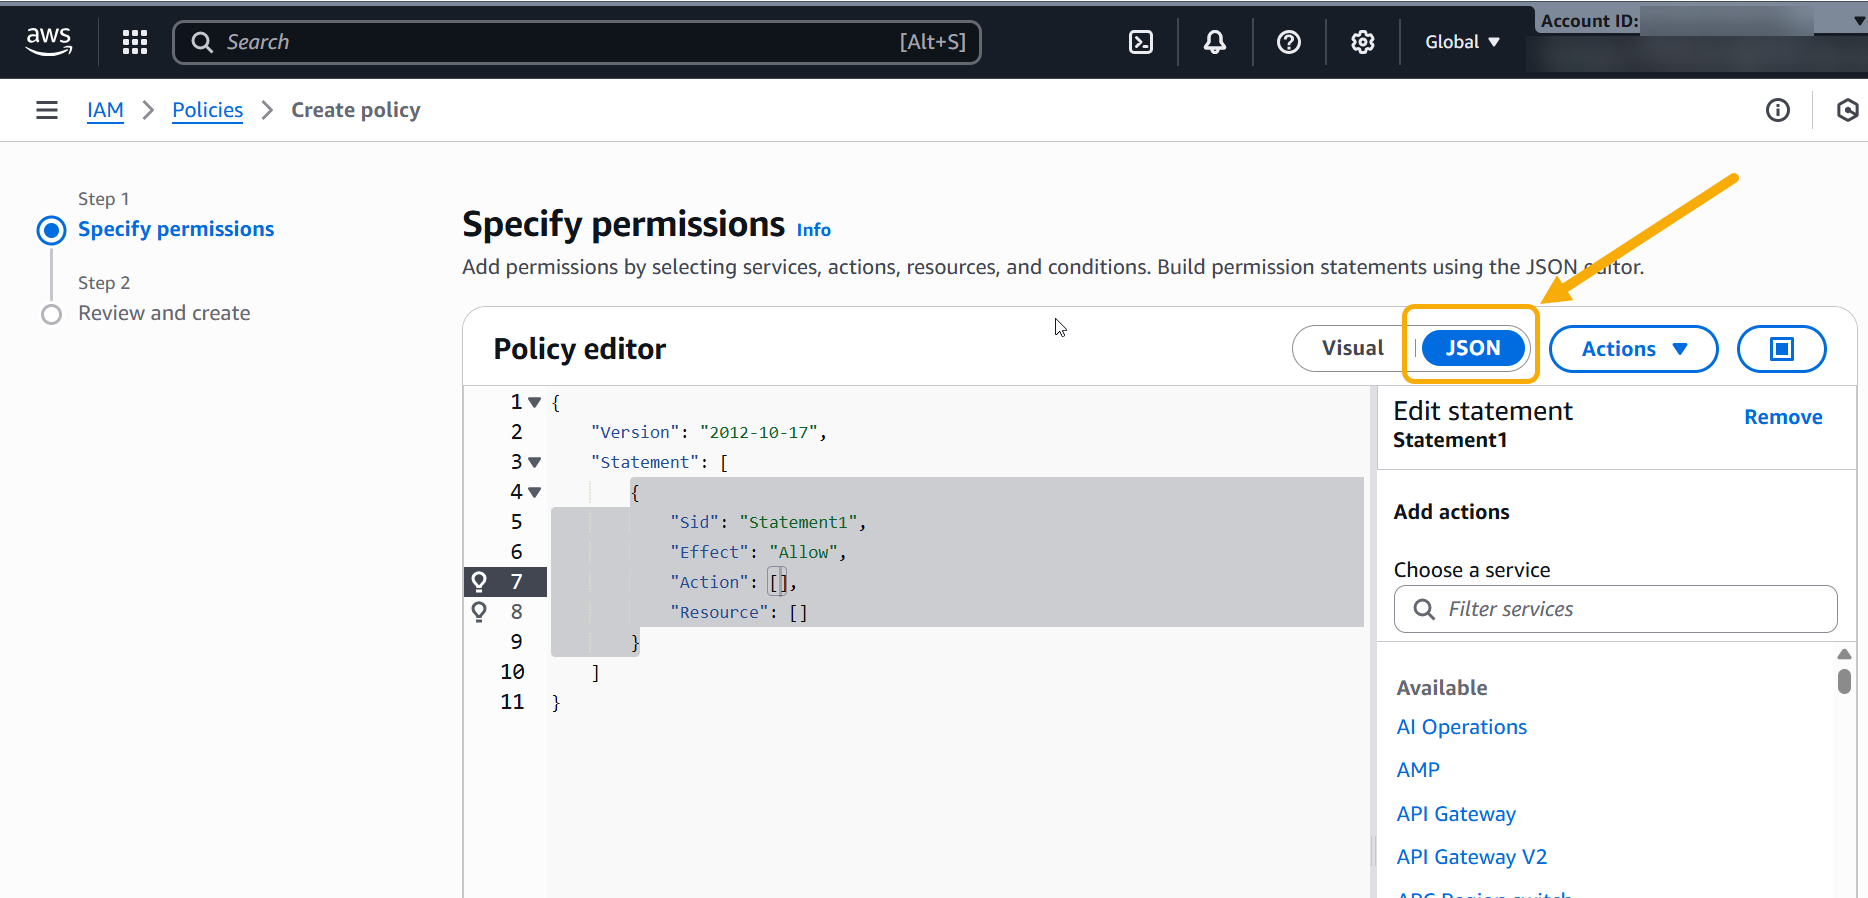
Click the Create policy button.
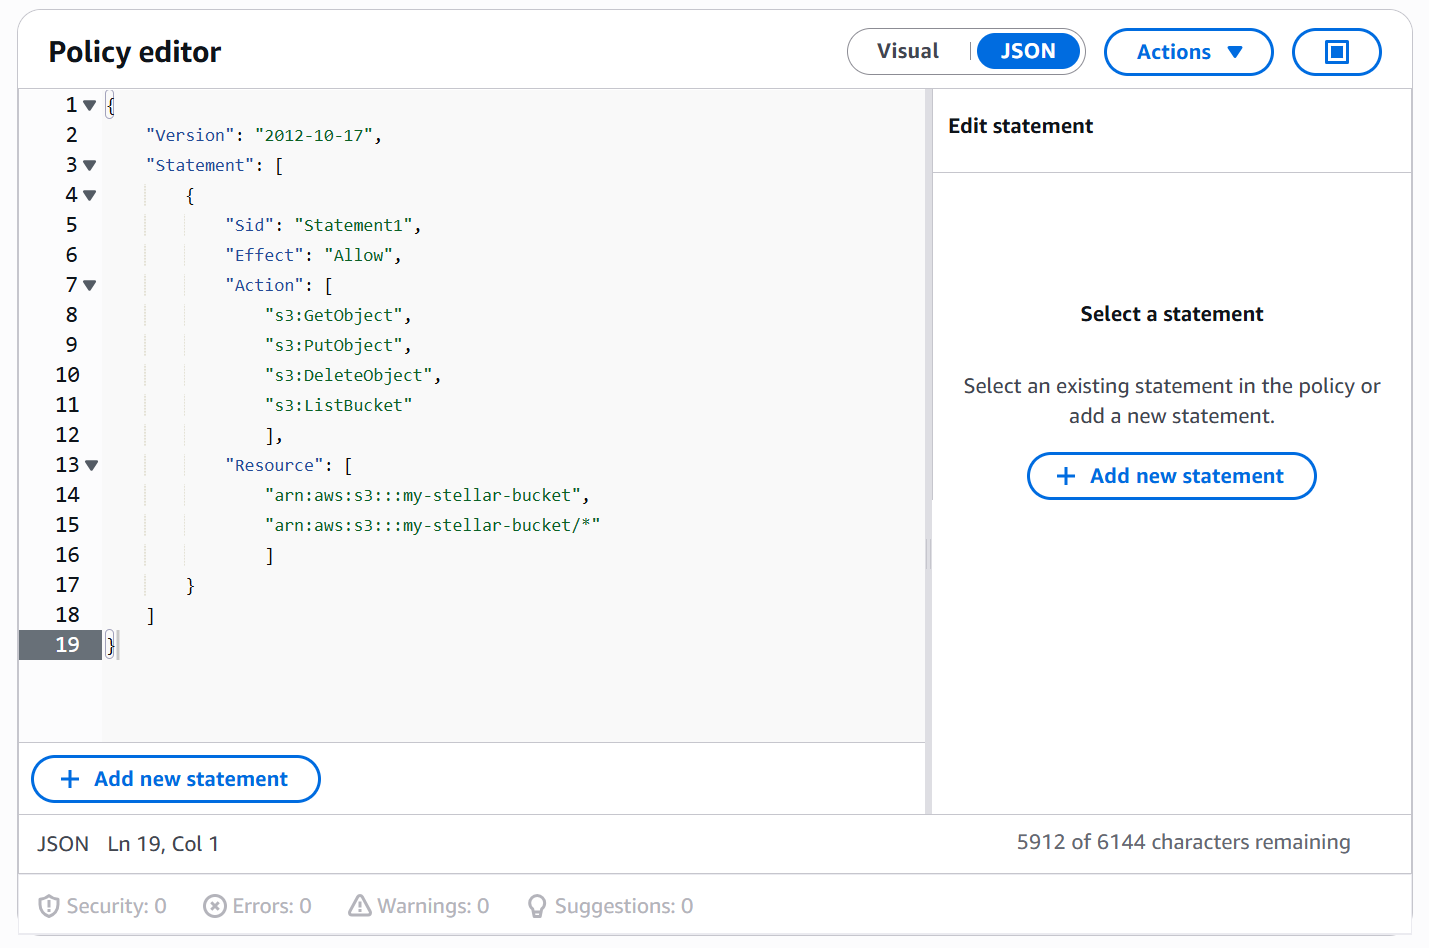
The Policy editor opens.
-
Click the JSON button as shown in the figure below:
-
Edit the text provided by the Policy Editor as follows:
-
Add the following S3 permissions to the Action list:
-
s3:GetObject
-
s3:PutObject
-
s3:DeleteObject
-
s3:ListBucket
-
-
Add the Amazon Resource Name for the bucket you created in the previous section to the Resource list. You can get the Amazon Resource Name by clicking your bucket in the S3 Console and going to the Properties tab. For example:
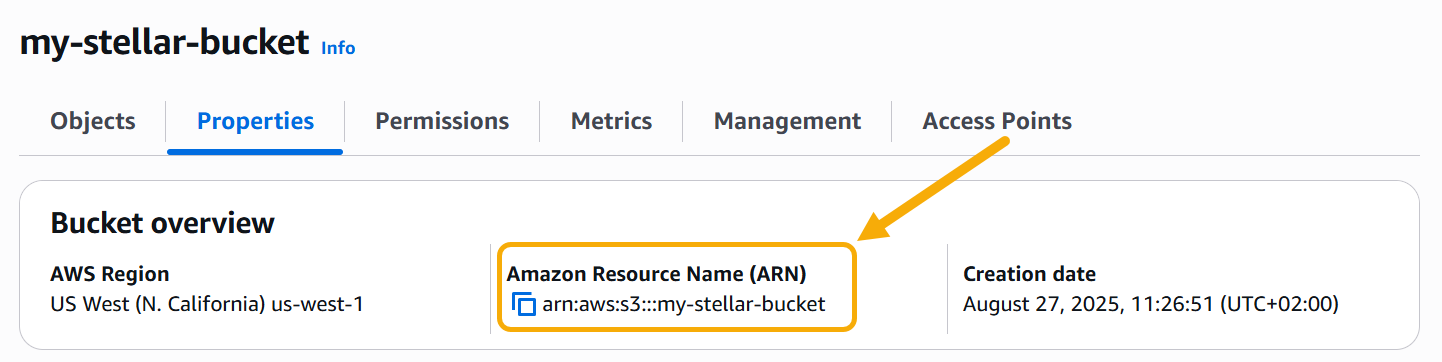
Here's how our policy looks in the Policy Editor using the Amazon Resource Name for our sample my-stellar-bucket:
-
-
Click Next.
-
Supply a Policy name and optional Description.
-
Click Create policy to create the new policy.
Creating a User and Attaching the IAM Policy
Next, you need to create an IAM user and attach the policy you just created to it.
-
If you're not still in the IAM Console from the previous procedure, navigate there now.
-
Click the Access Management | Users entry in the left navigation panel.
-
Click the Create user button.
-
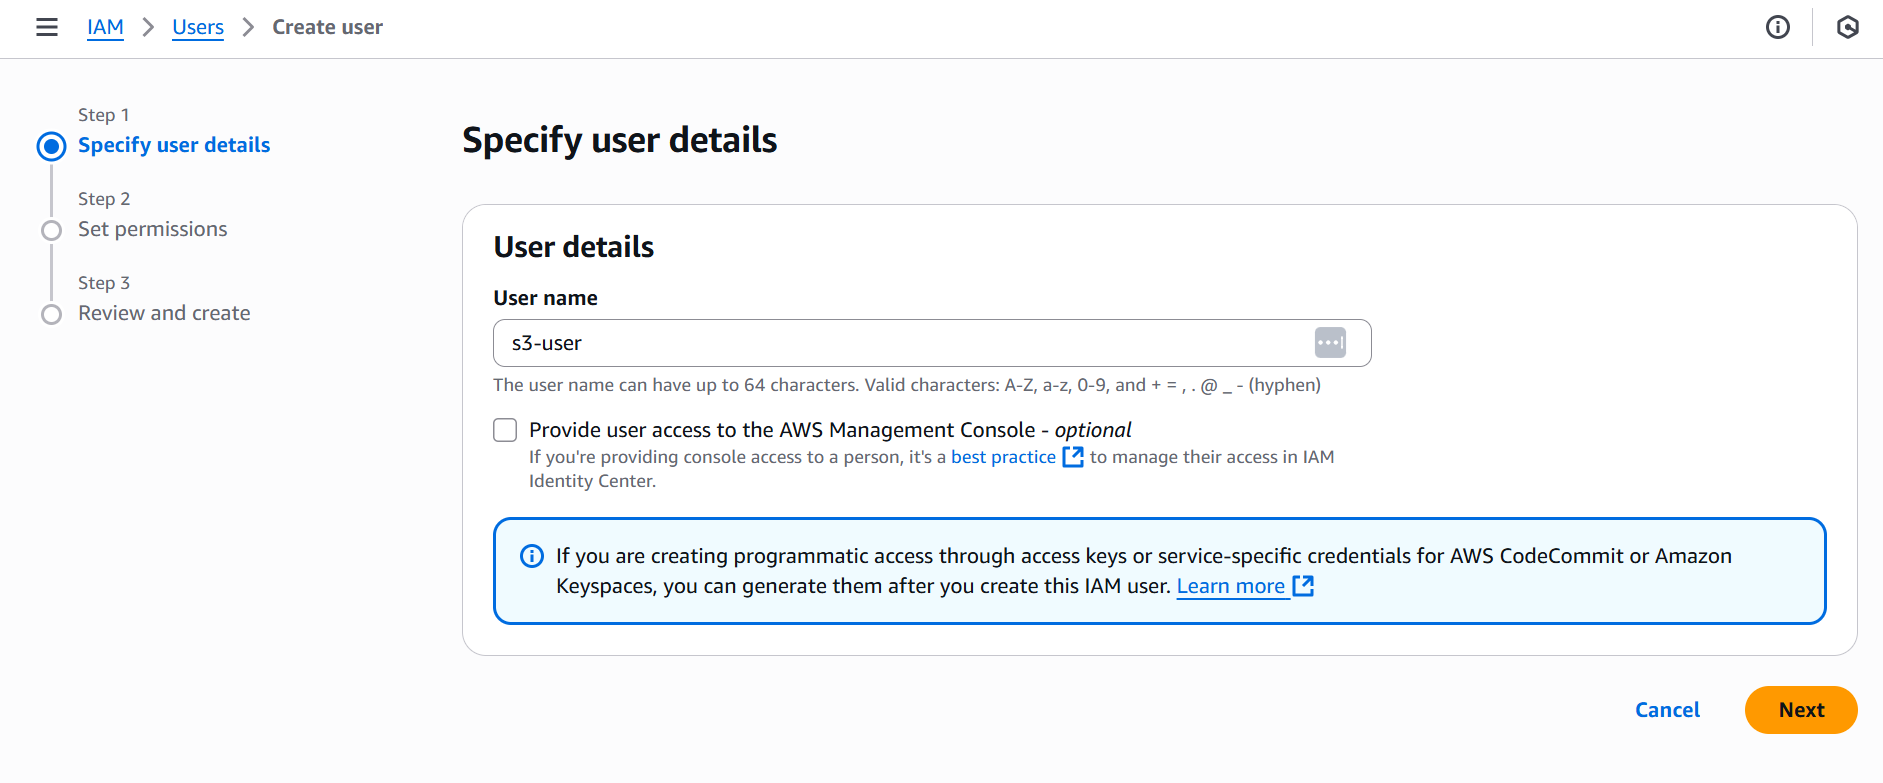
Supply a User name for the user.
You can also provide access to the AWS Management Console if it suits your needs. However, the main purpose for this user is programmatic access, so we'll generate them after we create the user, as suggested by AWS in the image below:
Refer to the AWS documentation on Creating IAM Users for details.
-
Click Next.
-
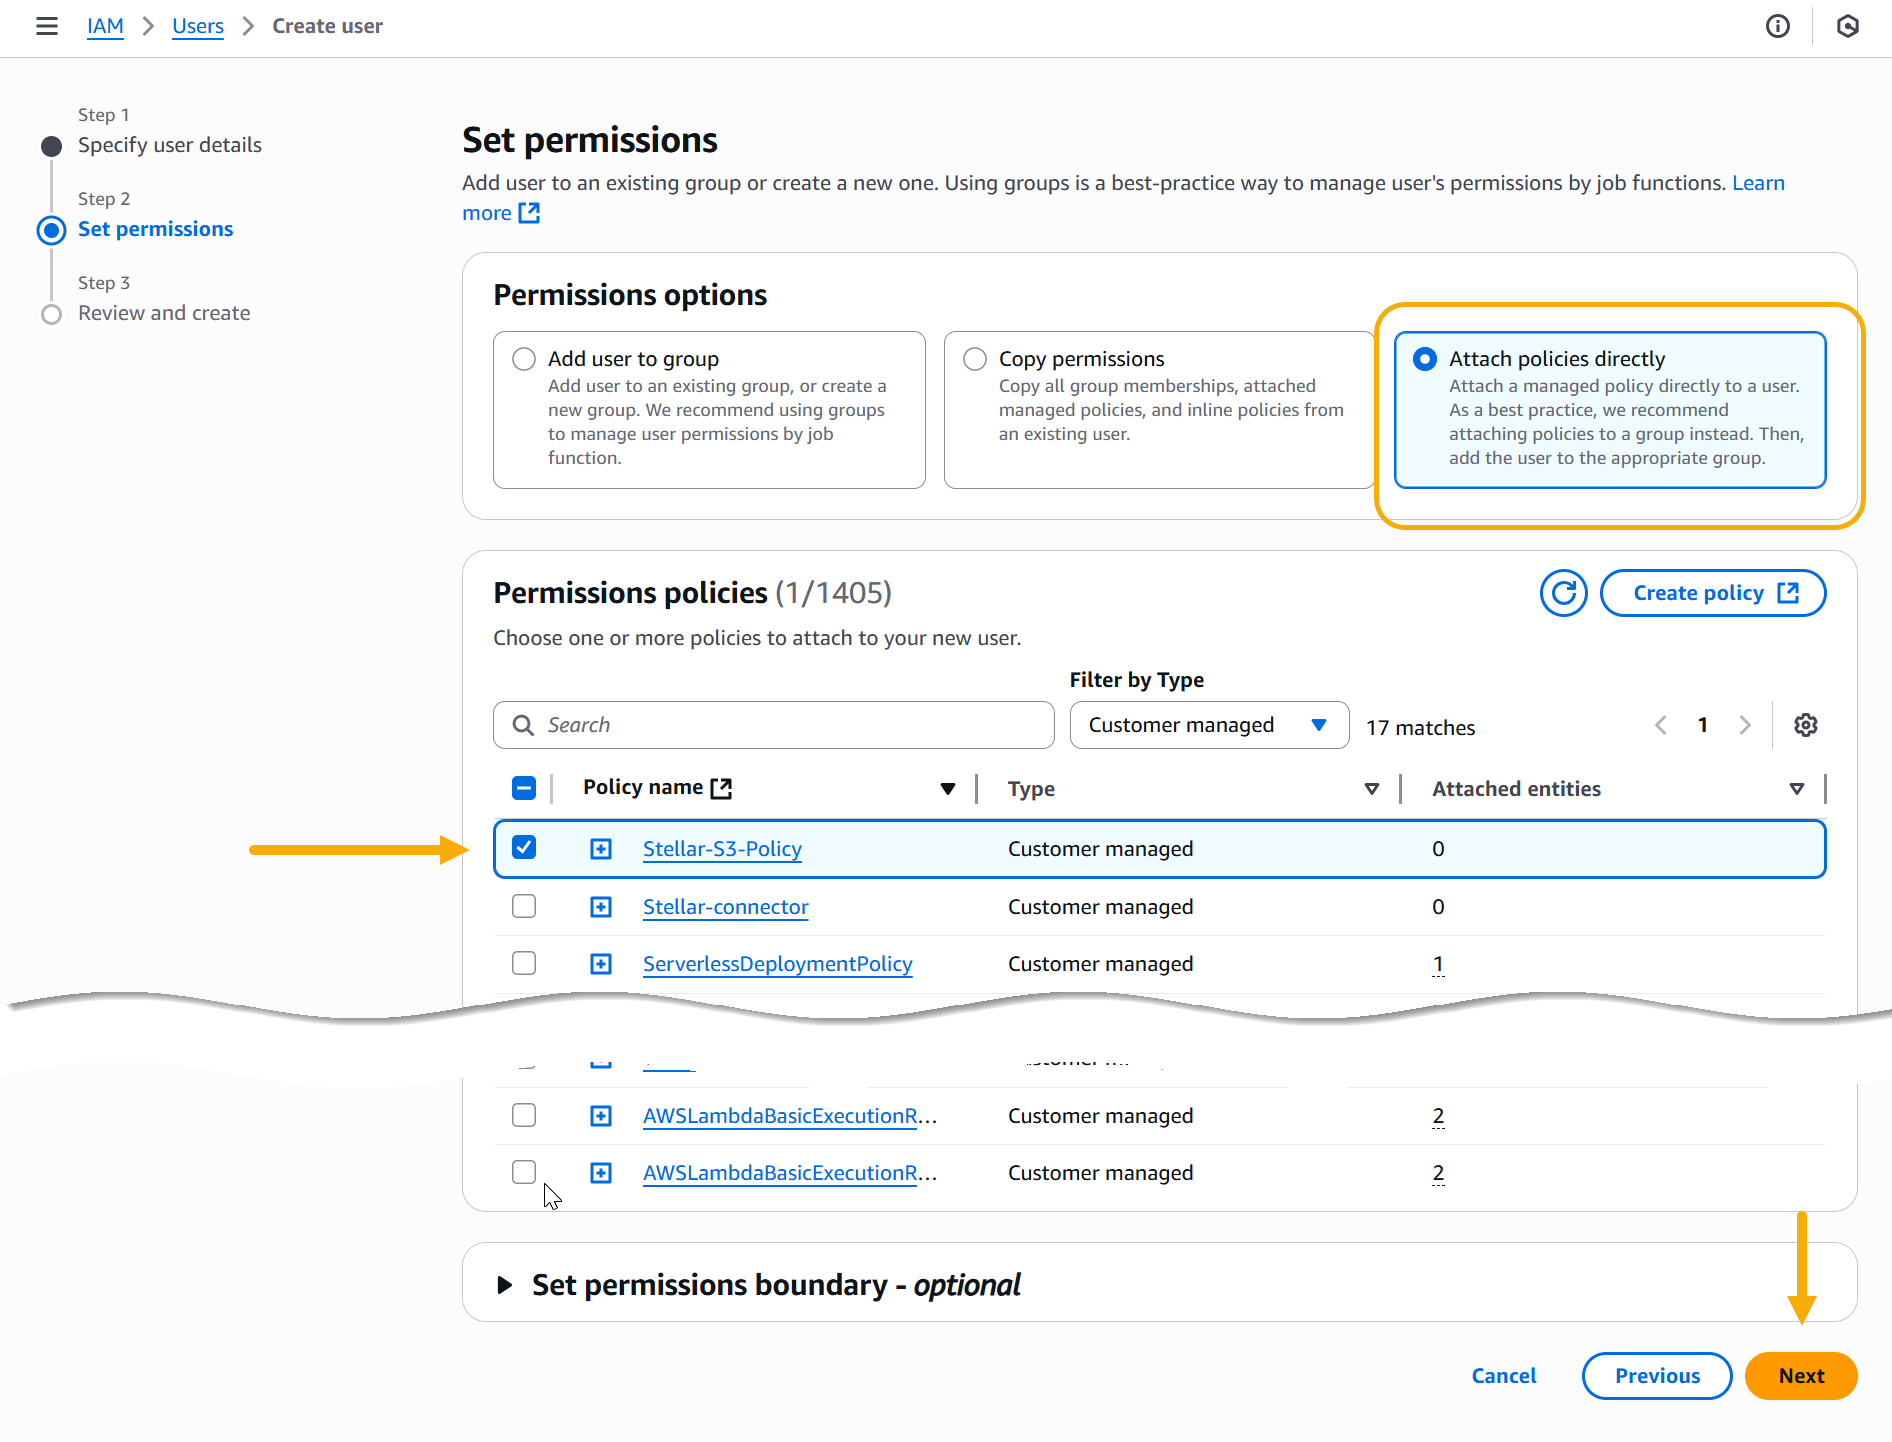
In the Set permissions step, select the Attach policies directly option. Then, select the policy you created in the previous procedure and click Next to continue.
-
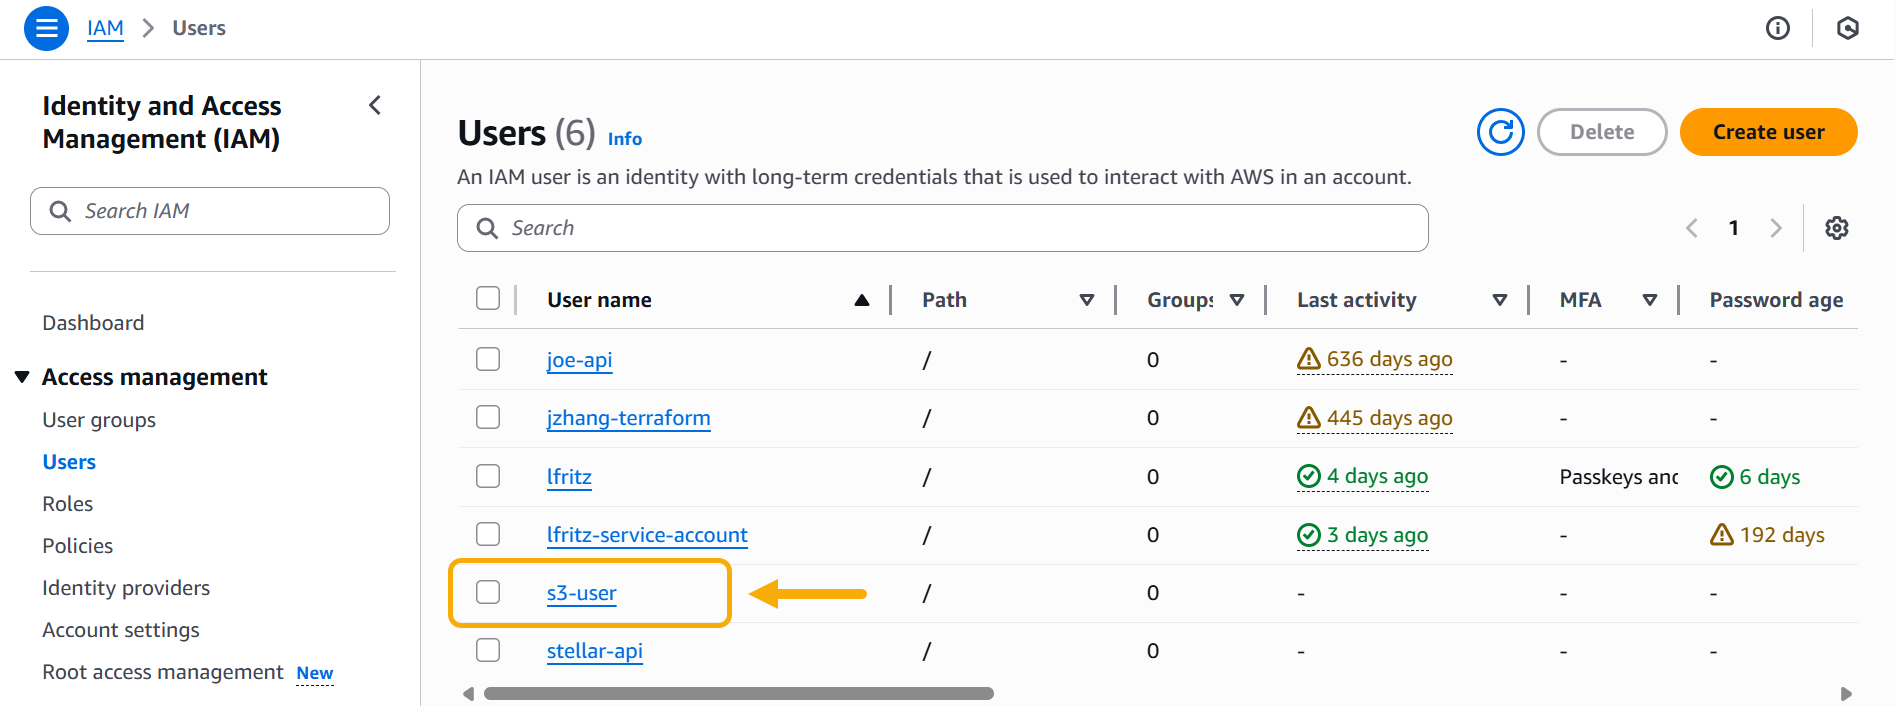
Review your settings and click Create user to create the user.
The new user appears in the Users list in the console.
Generating Access Keys for the IAM User
Next, you need to generate the access key used for programmatic access to AWS by your new user.
-
Click the entry for your user in the Users list.
-
Click the Security credentials tab.
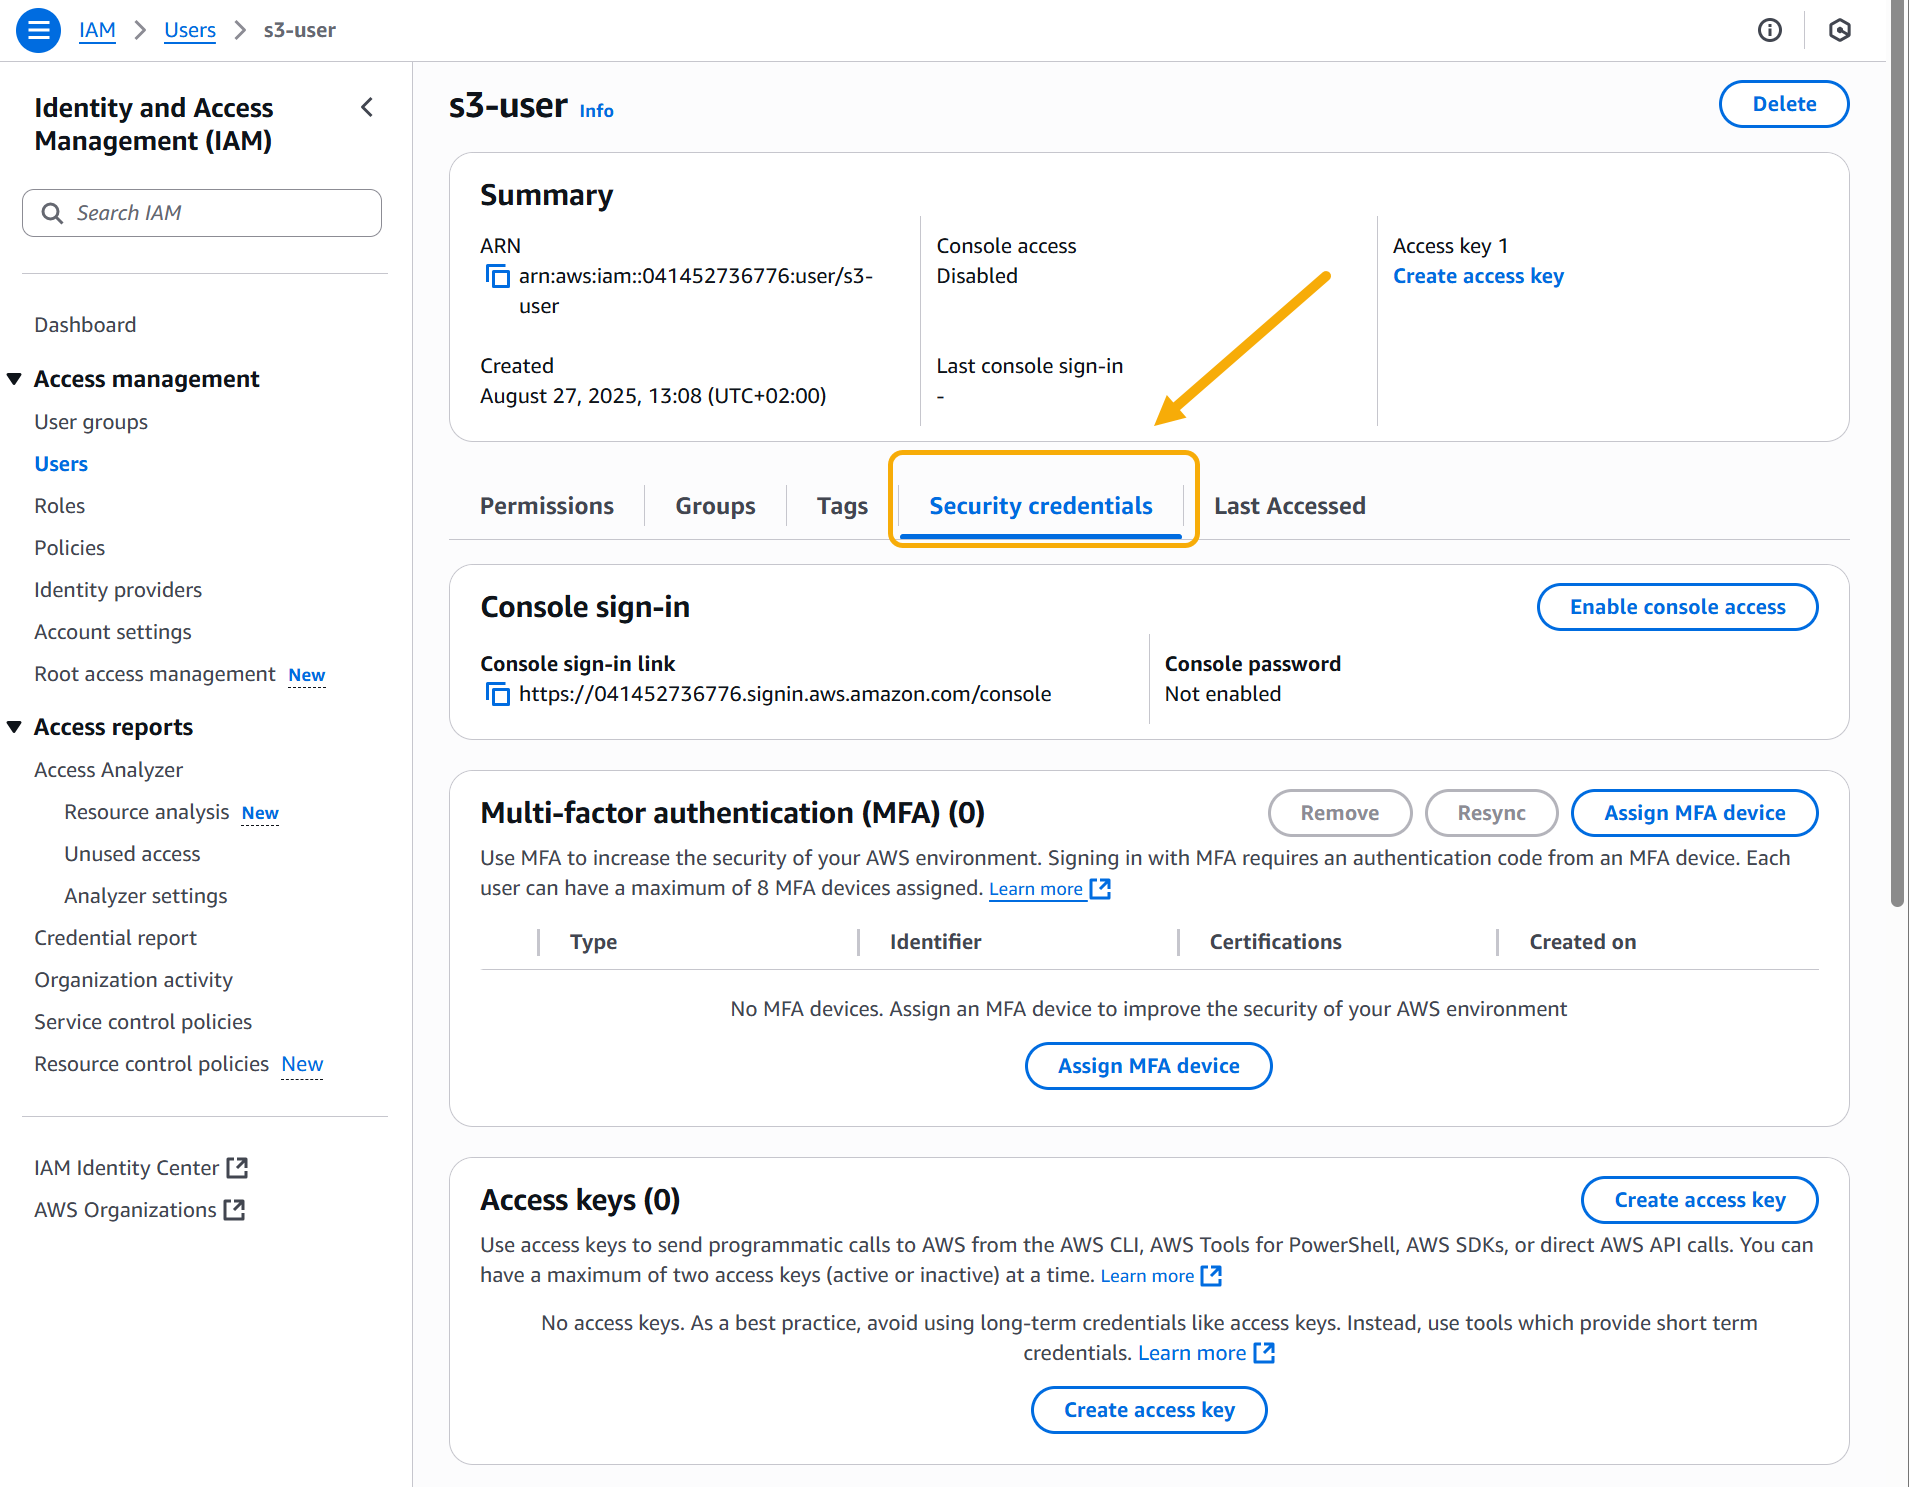
-
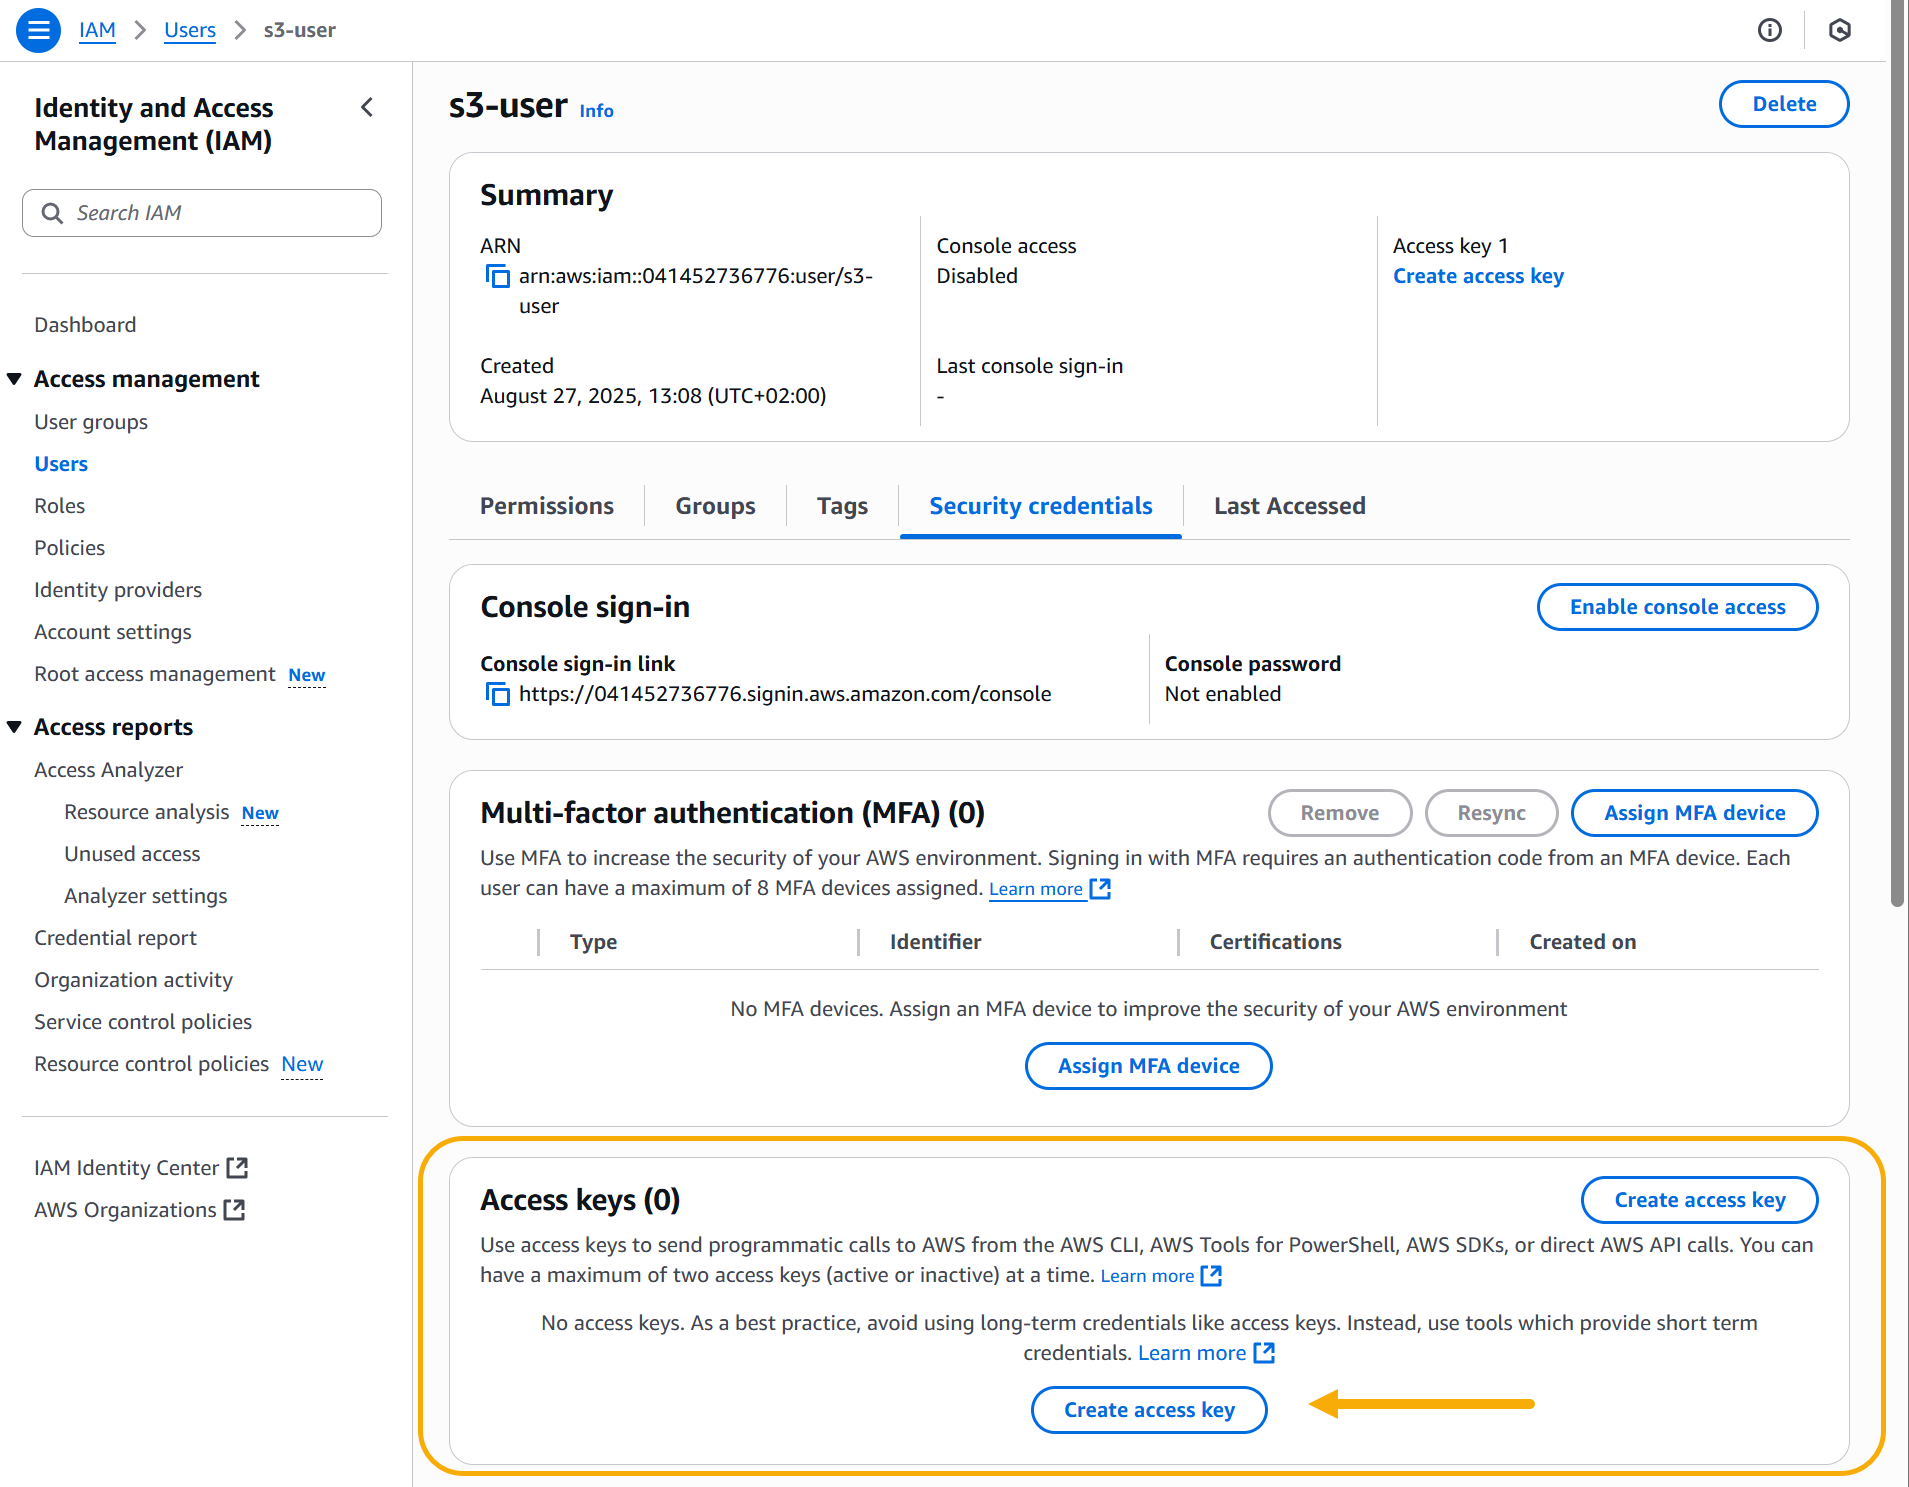
Scroll down to the Access keys panel and click Create access key.
-
Select Other on the Access key best practices screen and click Next.
-
Supply an optional description tag and click the Create access key button.
-
Download the CSV file containing your access key and secret access key. You will need these keys when you add the S3 external storage in Stellar Cyber.
This is the only time the keys can be viewed or downloaded. If you lose or forget the keys, they cannot be retrieved later. However, you can always create a new access key and set the old one as inactive.
In addition, make sure to follow the Access key best practices shown in the image below.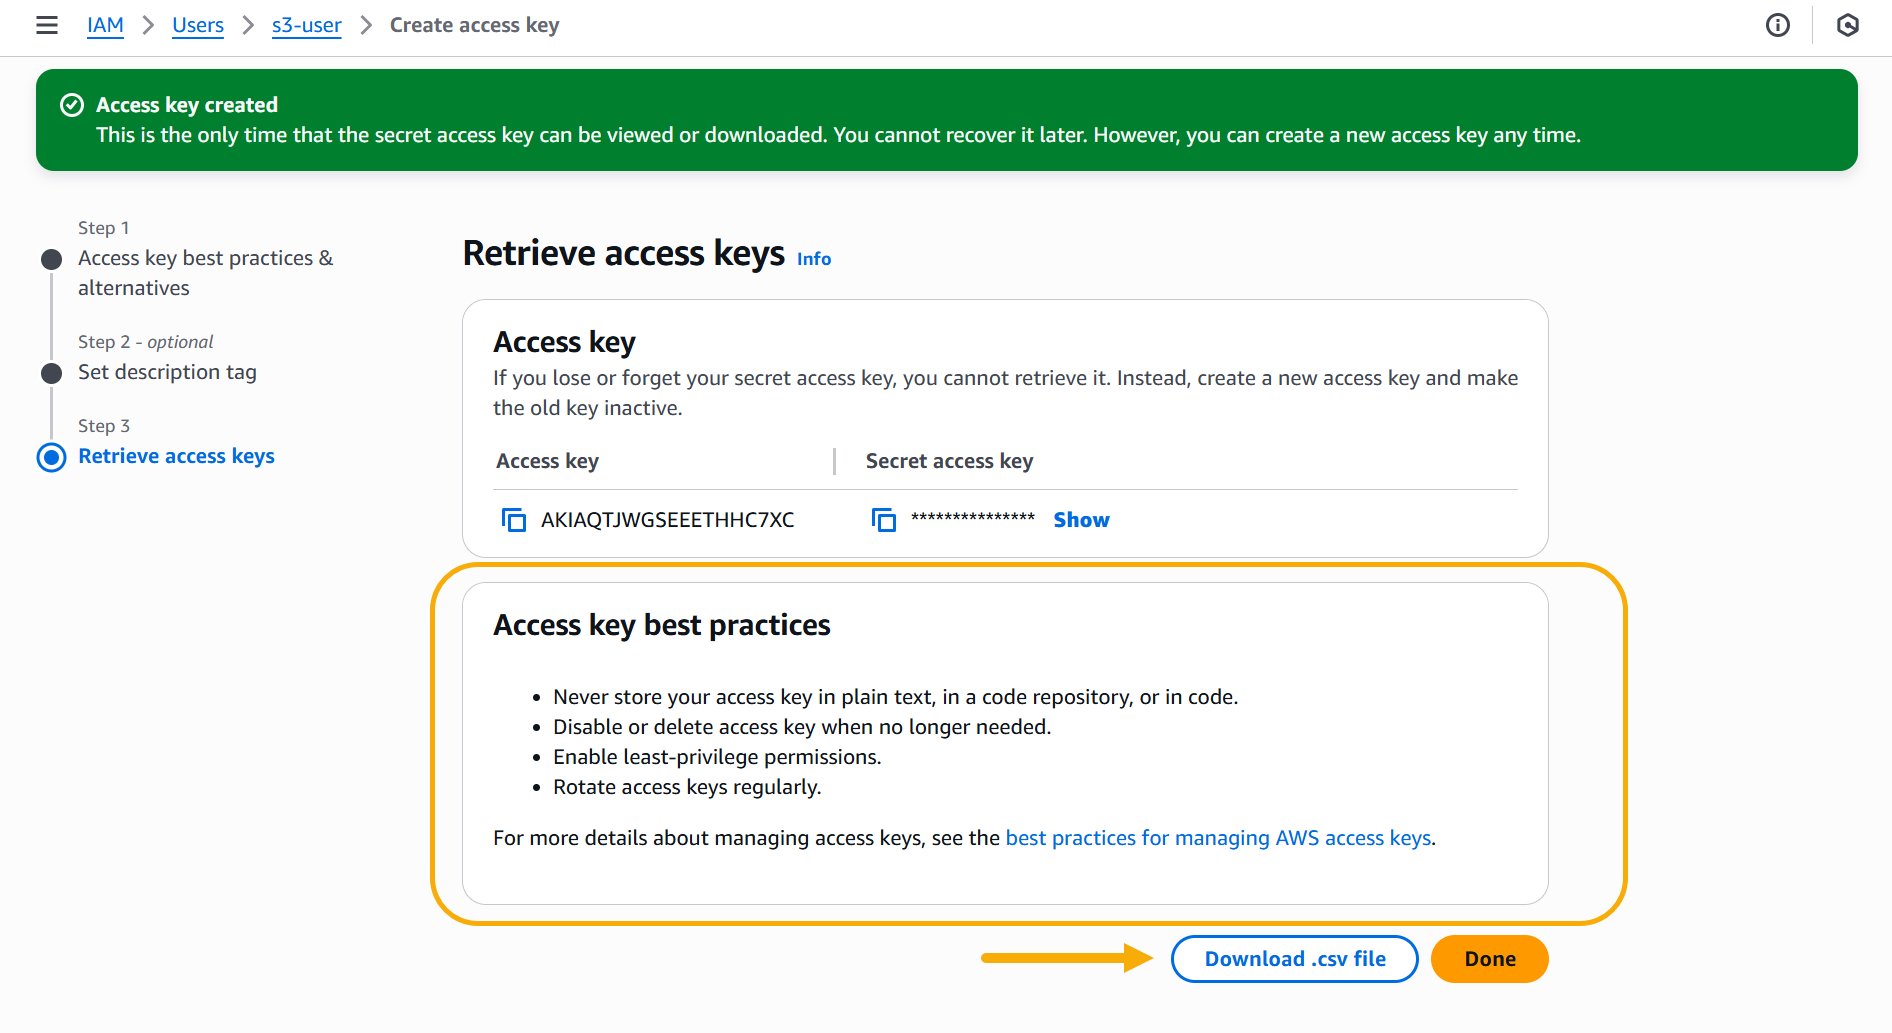
Adding S3 External Storage in Stellar Cyber
To add S3 external storage in Stellar Cyber:
-
Click System | DATA MANAGEMENT | Data Management.
-
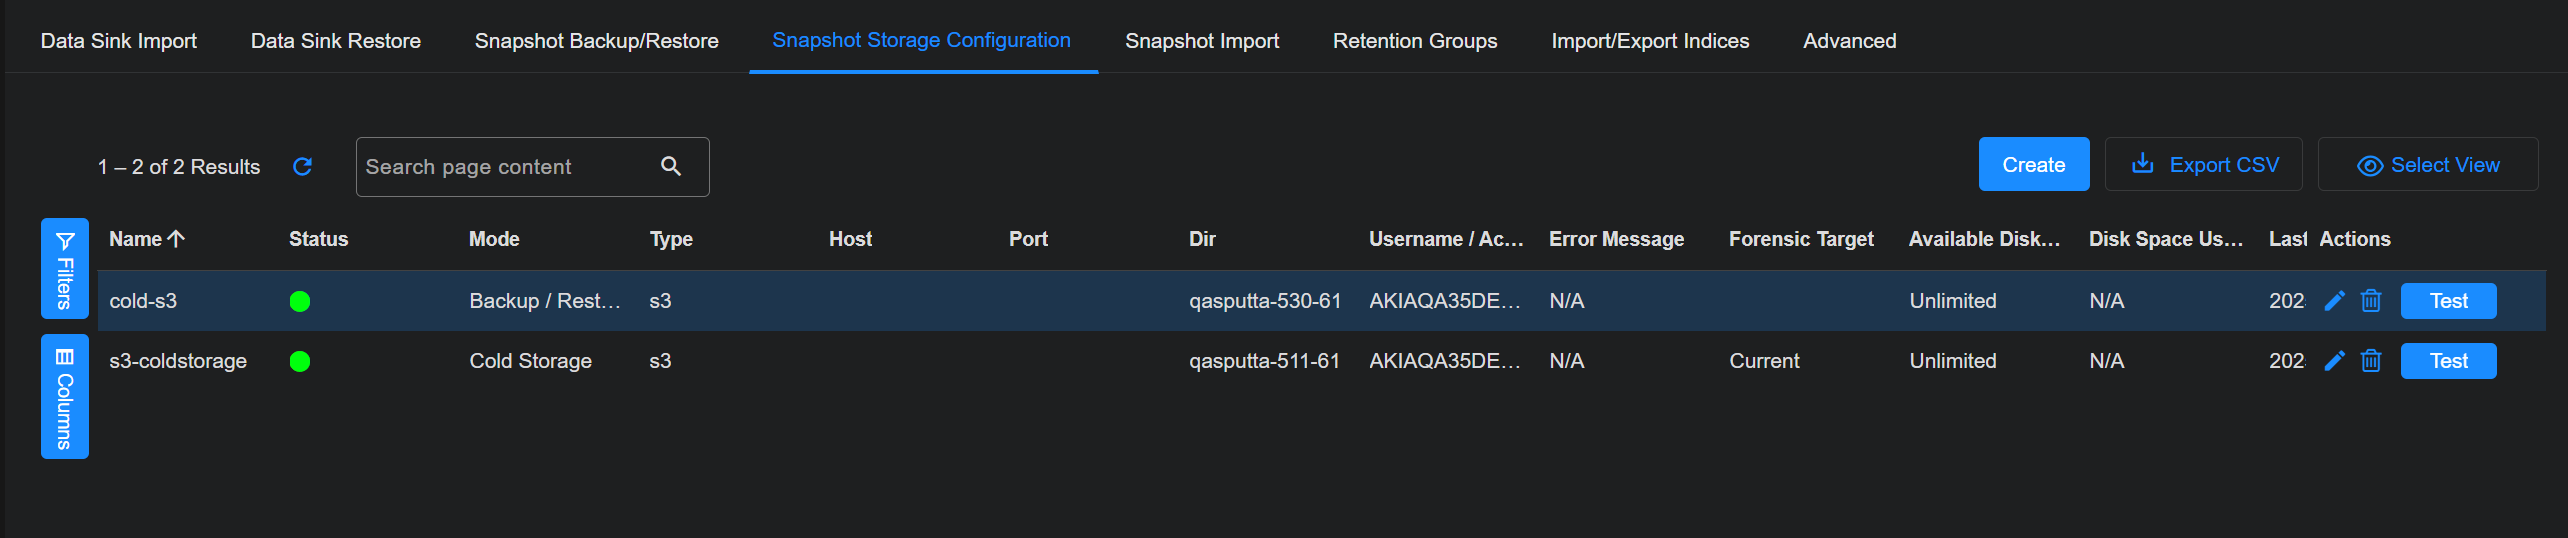
Click the Snapshot Storage Configuration tab. The existing storage locations are displayed.
-
Click .The Add External Storage screen appears.
-
Enter the Name of the new location. The name must be lowercase and can include numerals, underscores (_), and hyphens (-). This field does not support multibyte characters.
-
Choose the Mode. You can choose Backup/Restore or Cold Storage.
-
Choose S3 for the Type.
-
Enter the name of the Bucket you copied earlier.
-
Enter the Access Token. This is the Access Key you copied earlier.
-
Enter the Secret Token. This is the Secret Key you copied earlier.
-
Choose the Forensic Target (for Cold Storage). If you choose Current Data Processor, Stellar Cyber increases the buffer size to account for the additional storage space needed. You can import from cold storage to your current DP or a to dedicated forensic DP regardless of which target you choose.
-
Click Submit.
